Fix Automatic Repair Loop in Windows: 9 Ways to Break the Cycle
“Preparing Automatic Repair”, “Diagnosing your PC”, “Couldn’t repair your PC”, restart, repeat. Here is how to break out of the loop, usually without losing a single file.
By ConfirmFix Editorial Team · Updated November 2, 2026
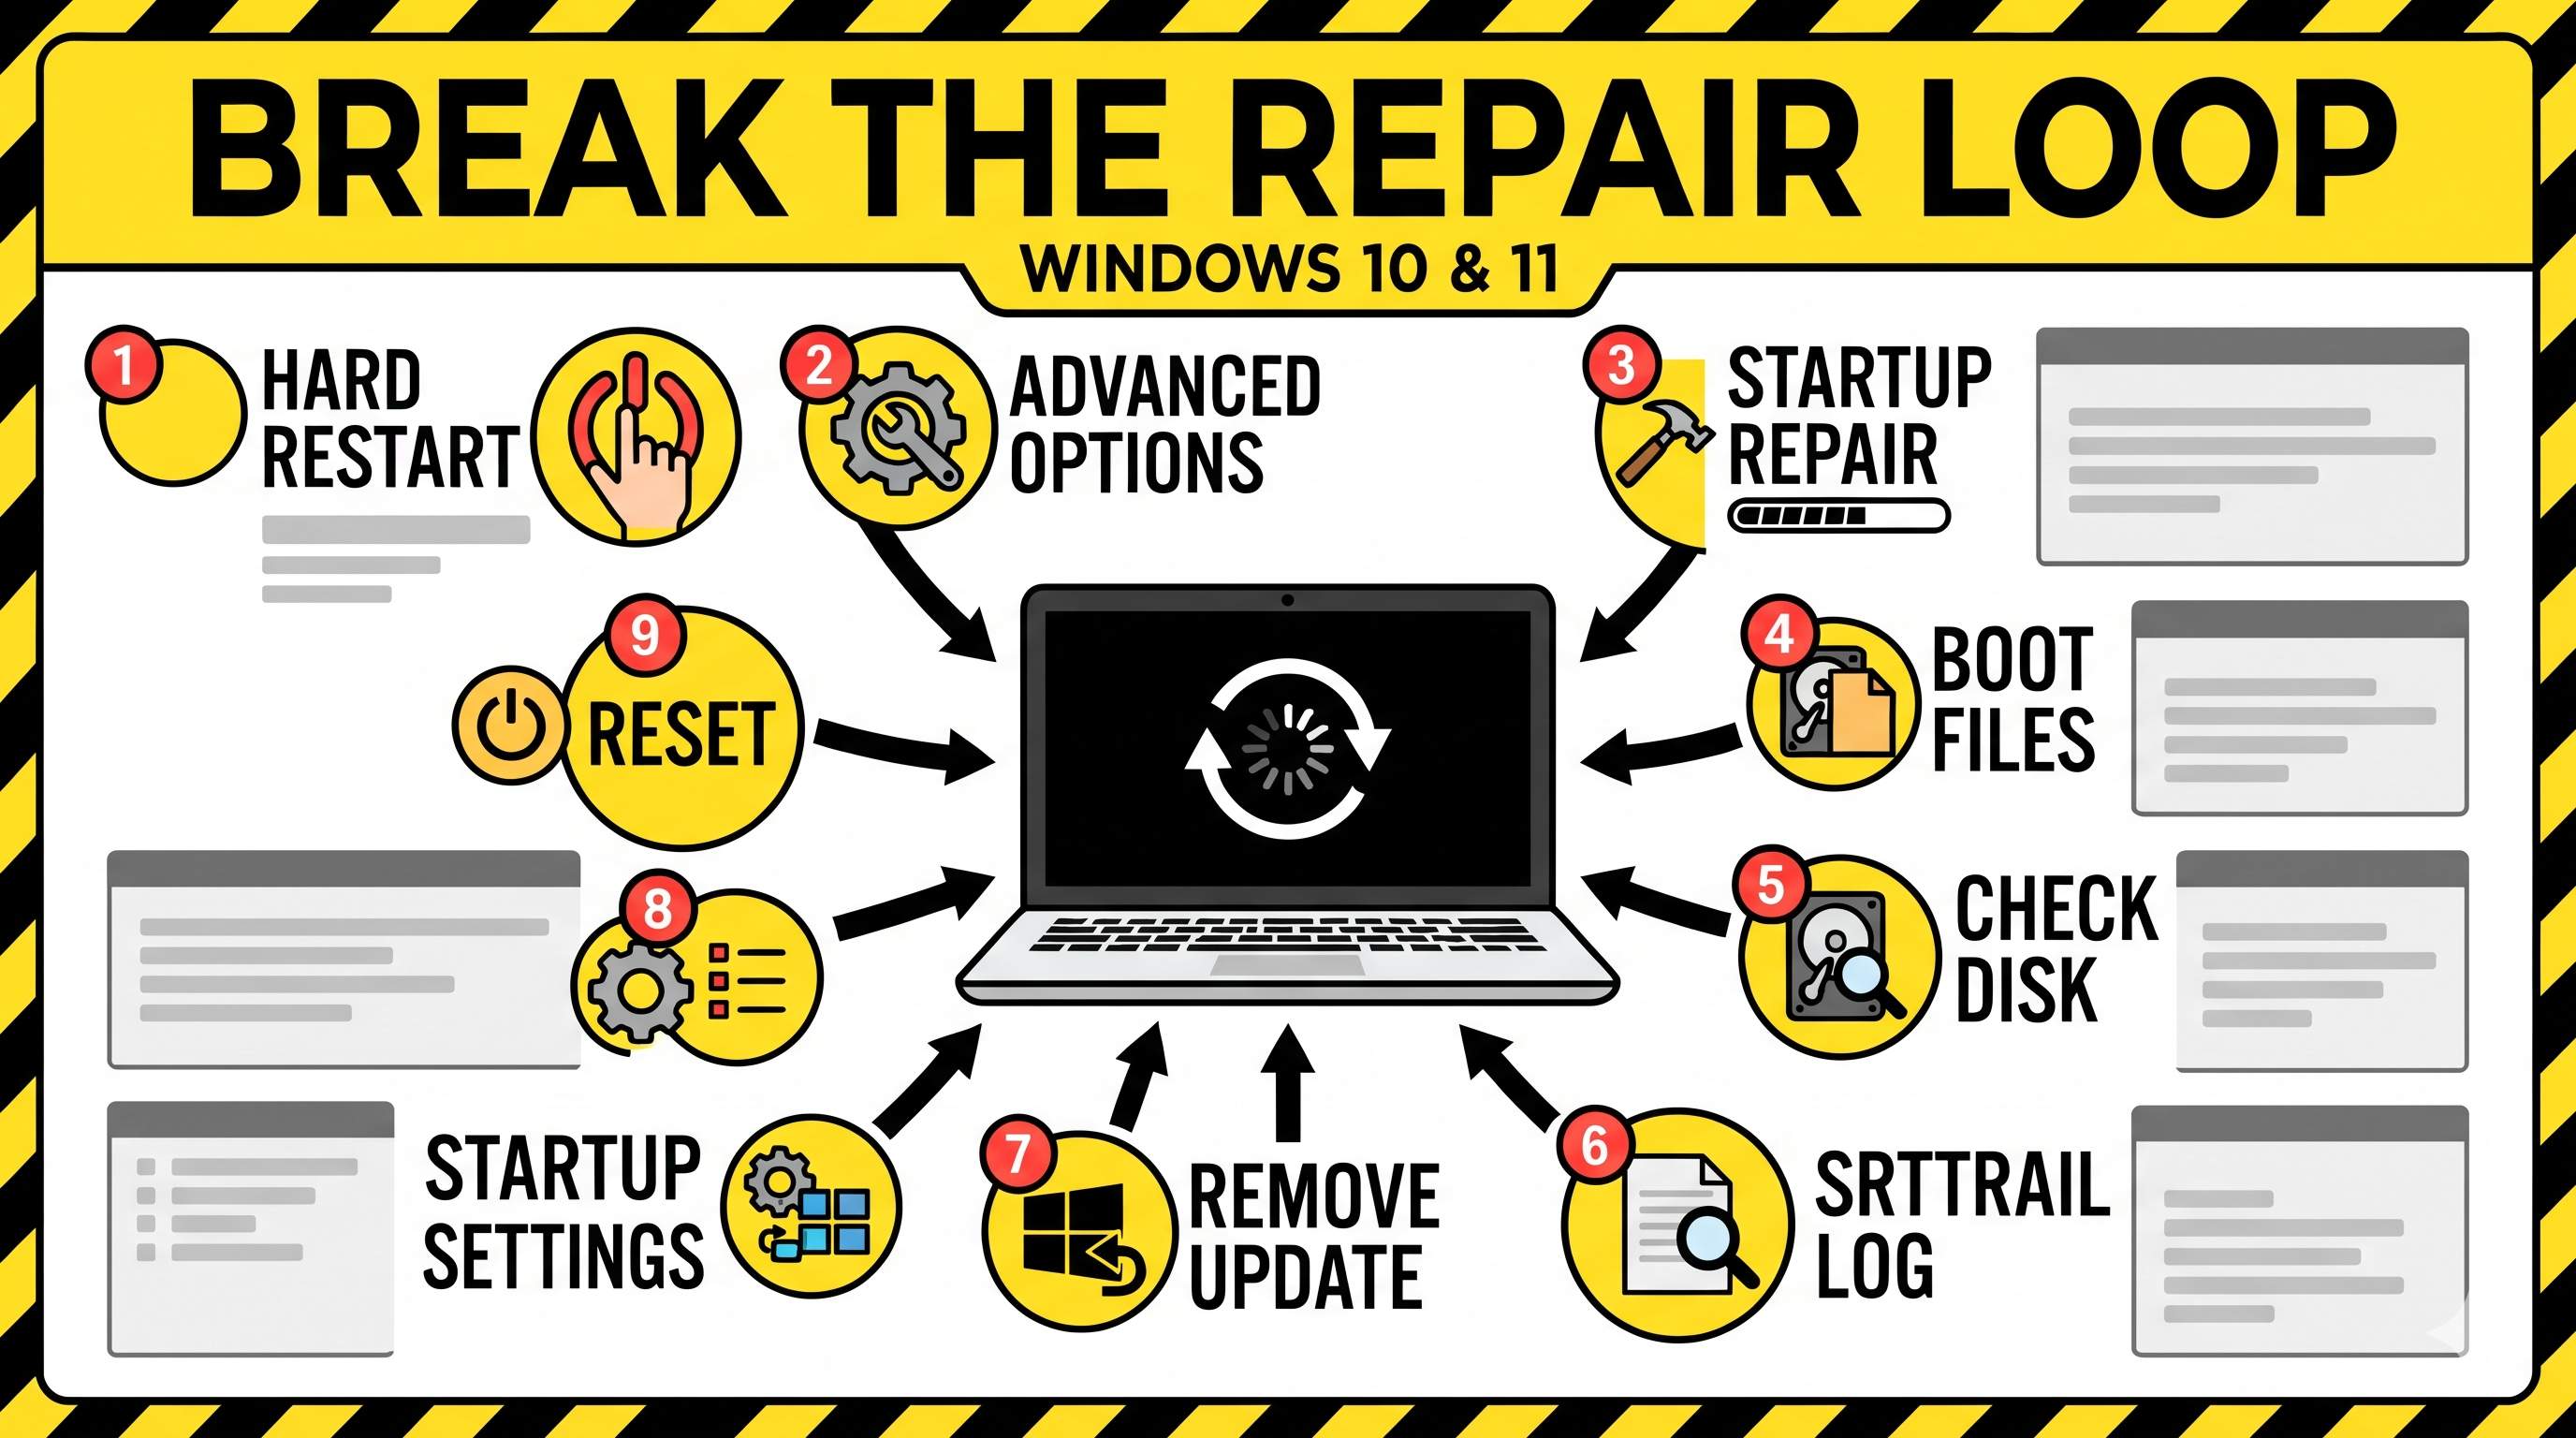
Quick answer
The loop means Windows failed to start and its built-in repair failed too. Reach the Advanced options screen (Fix 2), then work through Startup Settings, boot file repair, update removal and System Restore. These repairs fix most loops and keep your files.
| Common cause | Fix |
|---|---|
| A recent Windows update went wrong | Fix 7 |
| Damaged boot files | Fix 3, 4 |
| Disk errors or damaged system files | Fix 5 |
| A bad driver or startup protection | Fix 6, 8 |
| Failing drive (loop returns after every fix) | Fix 5, then replace the drive |
Which screen are you stuck on?
The 9 fixes
1Hard restart and unplug everything3 minutes · Easy+
- Turn the PC off and unplug the charger. Remove USB drives, printers and other devices.
- Hold the power button for 15 seconds, then reconnect the charger and turn the PC on.
Sometimes a connected device or a power glitch triggers the loop. If you still see the same screens, continue.
2Reach the Advanced options screenNeeded for Fixes 3 to 8 · Easy+
If you see Automatic Repair couldn’t repair your PC, click Advanced options. If the screen never appears:
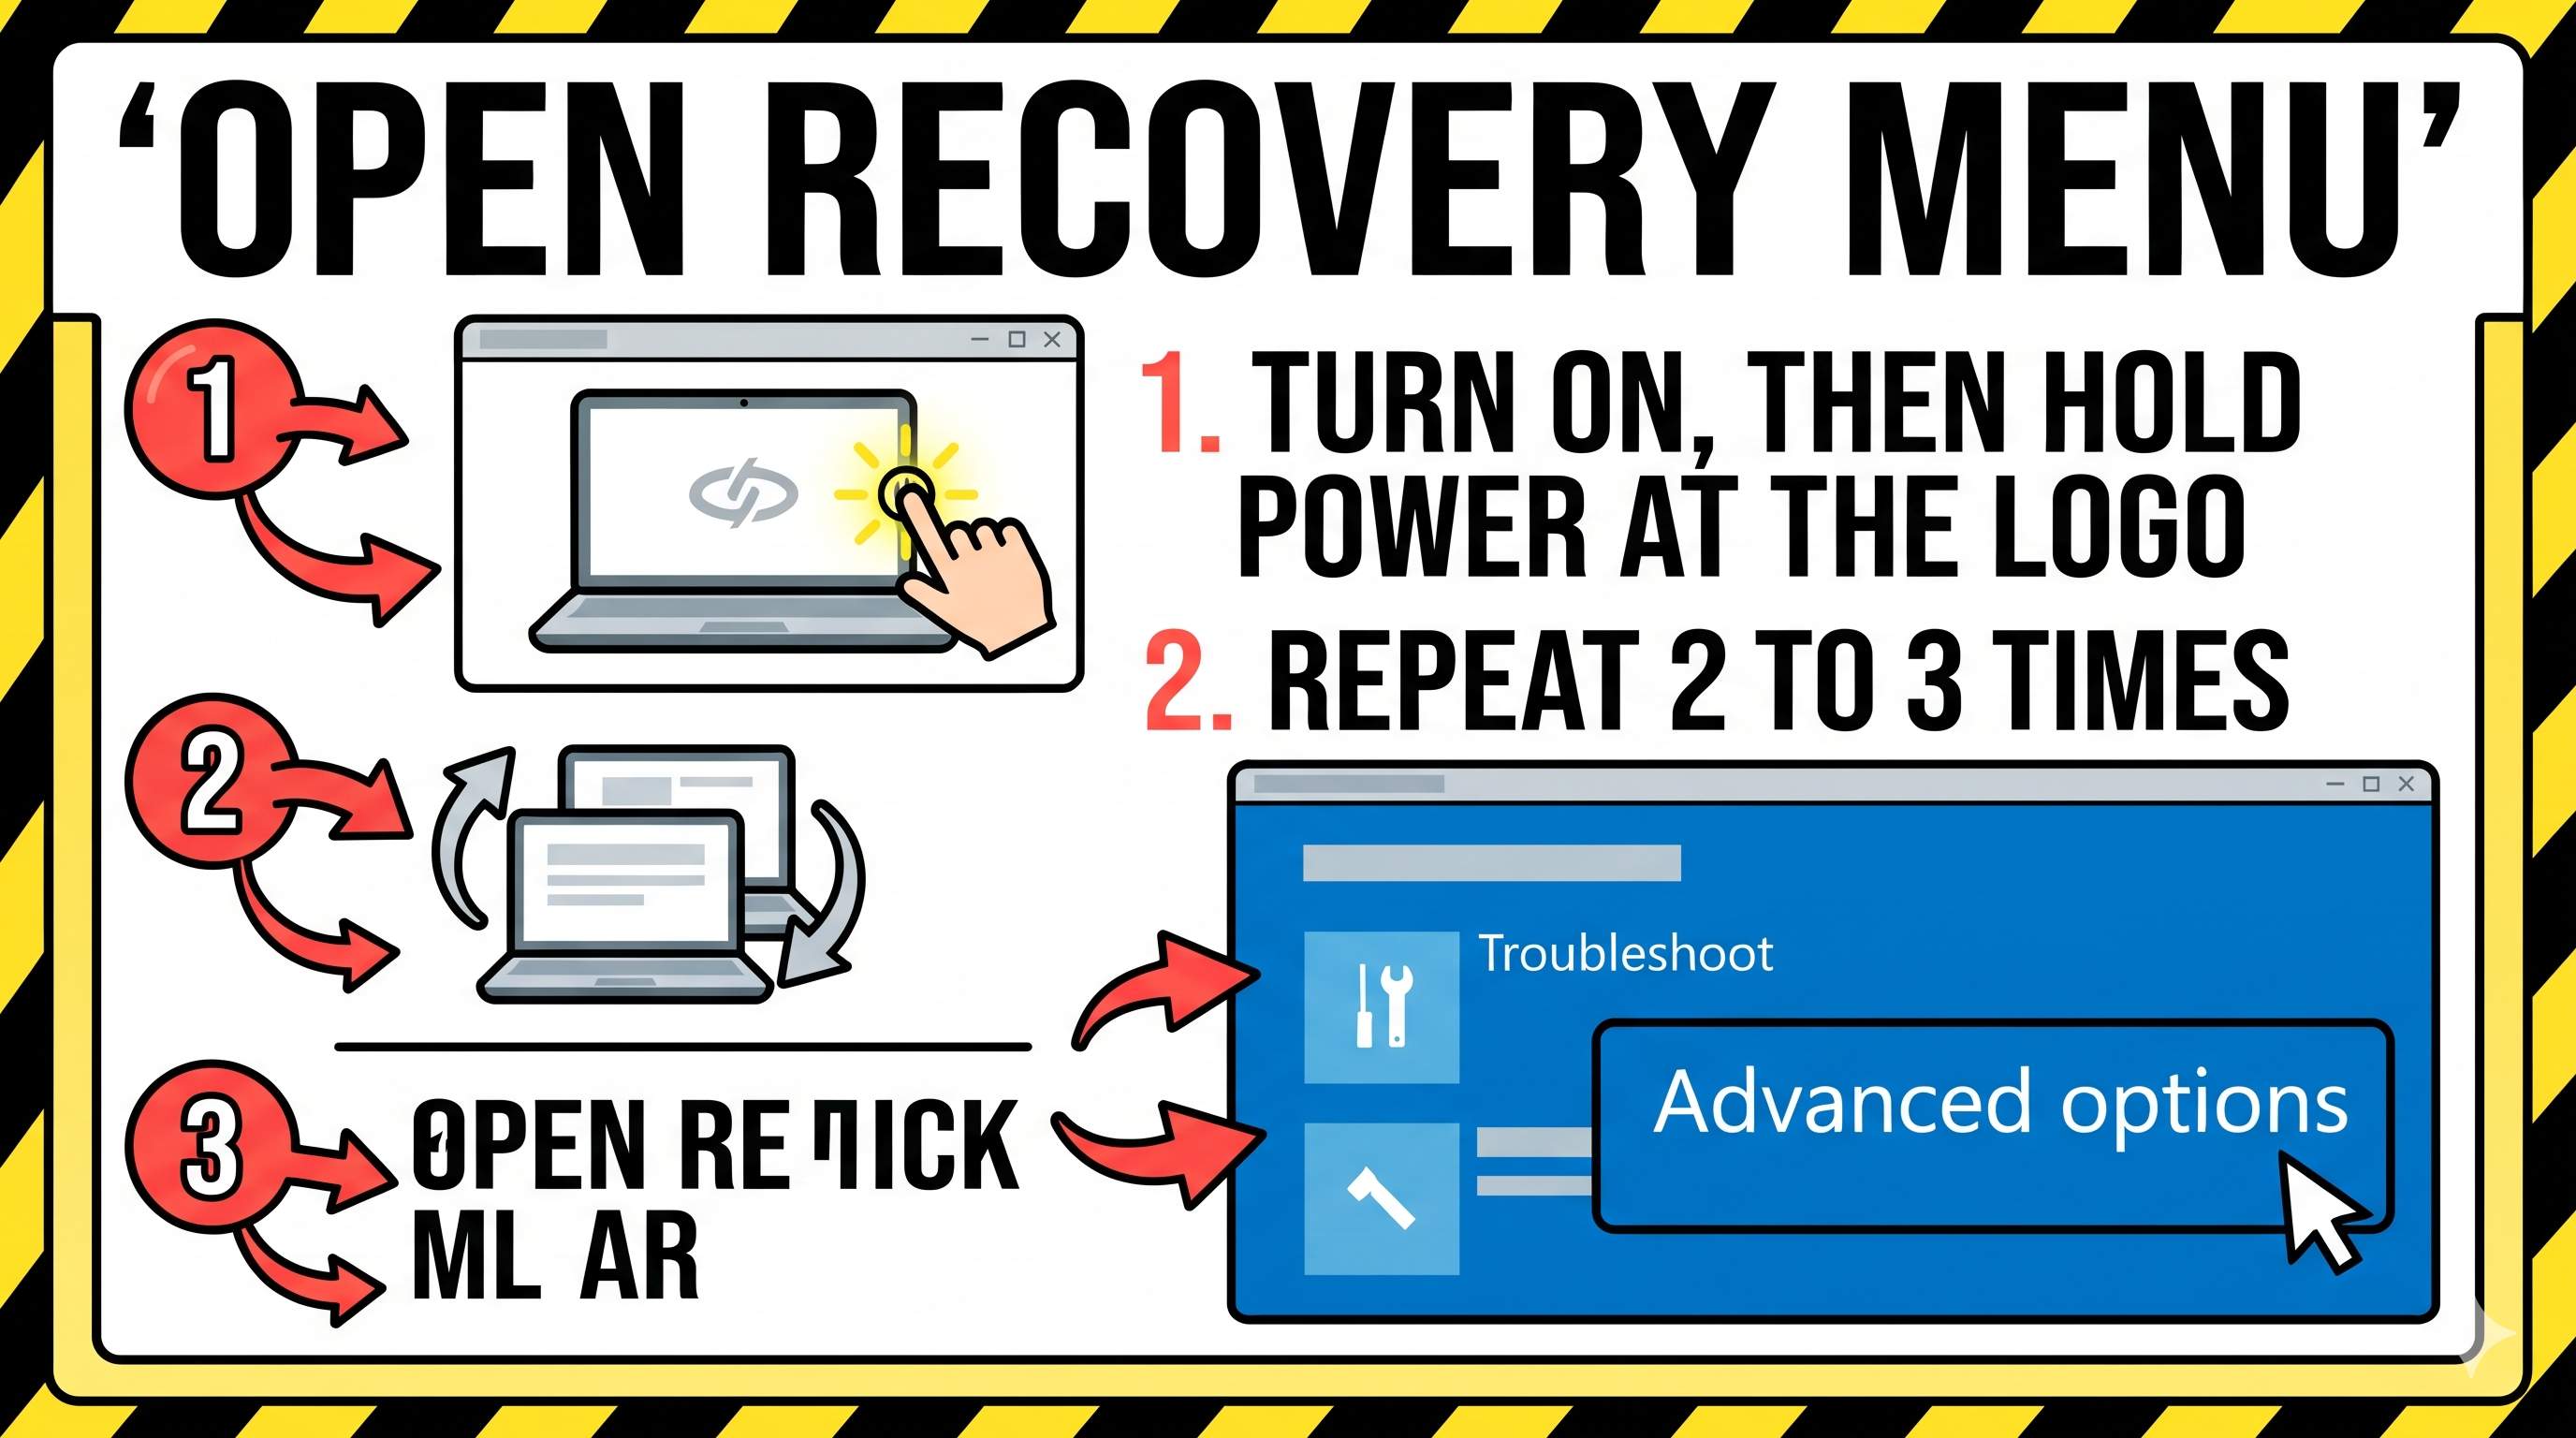
- Turn the PC on and, as soon as the logo or spinning dots appear, hold the power button to force a shutdown.
- Repeat this 2 to 3 times. On the next start, Windows opens the recovery menu on its own.
- Click See advanced repair options or Advanced options, then Troubleshoot → Advanced options.
No recovery menu? Boot from a Windows installation USB (press F12 or Esc for the boot menu) and choose Repair your computer.
3Run Startup Repair again10 minutes · Easy+
- Go to Troubleshoot → Advanced options → Startup Repair.
- Pick your account, enter the password if asked, and let it finish.
It often fails the first time, but running it from the menu (or from a USB) can succeed when the automatic run did not.
4Rebuild the boot files20 minutes · Medium+
Go to Advanced options → Command Prompt and run:
bootrec /fixmbr
bootrec /fixboot
bootrec /scanos
bootrec /rebuildbcd
If /fixboot says “Access is denied”, rebuild the EFI files: run diskpart, list vol, find the small FAT32 volume, then:
sel vol 3
assign letter=S
exit
bcdboot C:\Windows /s S: /f UEFI
Use your own volume number. If C: has no Windows folder, try D:. Step-by-step with brand-specific BIOS tips: HP guide and Dell guide.
5Check the disk and repair system files30 to 60 minutes · Medium+
In the same Command Prompt, run these commands. Windows may not be on C: in recovery, so check with dir C:\ first.
chkdsk C: /f /r
sfc /scannow /offbootdir=C:\ /offwindir=C:\Windows
Type exit and restart. The disk check can take an hour on a hard drive.
If the loop keeps returning after every repair, the drive may be failing. Back up your files and test the drive. See fix 100% disk usage for the health check command.
6Read the SrtTrail.txt log to find the cause10 minutes · Medium+
The “couldn’t repair” screen names a log file. It often says exactly what is broken.
notepad C:\Windows\System32\Logfiles\Srt\SrtTrail.txtScroll to the line that starts with Root cause found. It may name a driver or system file. Search that name to learn what it is.
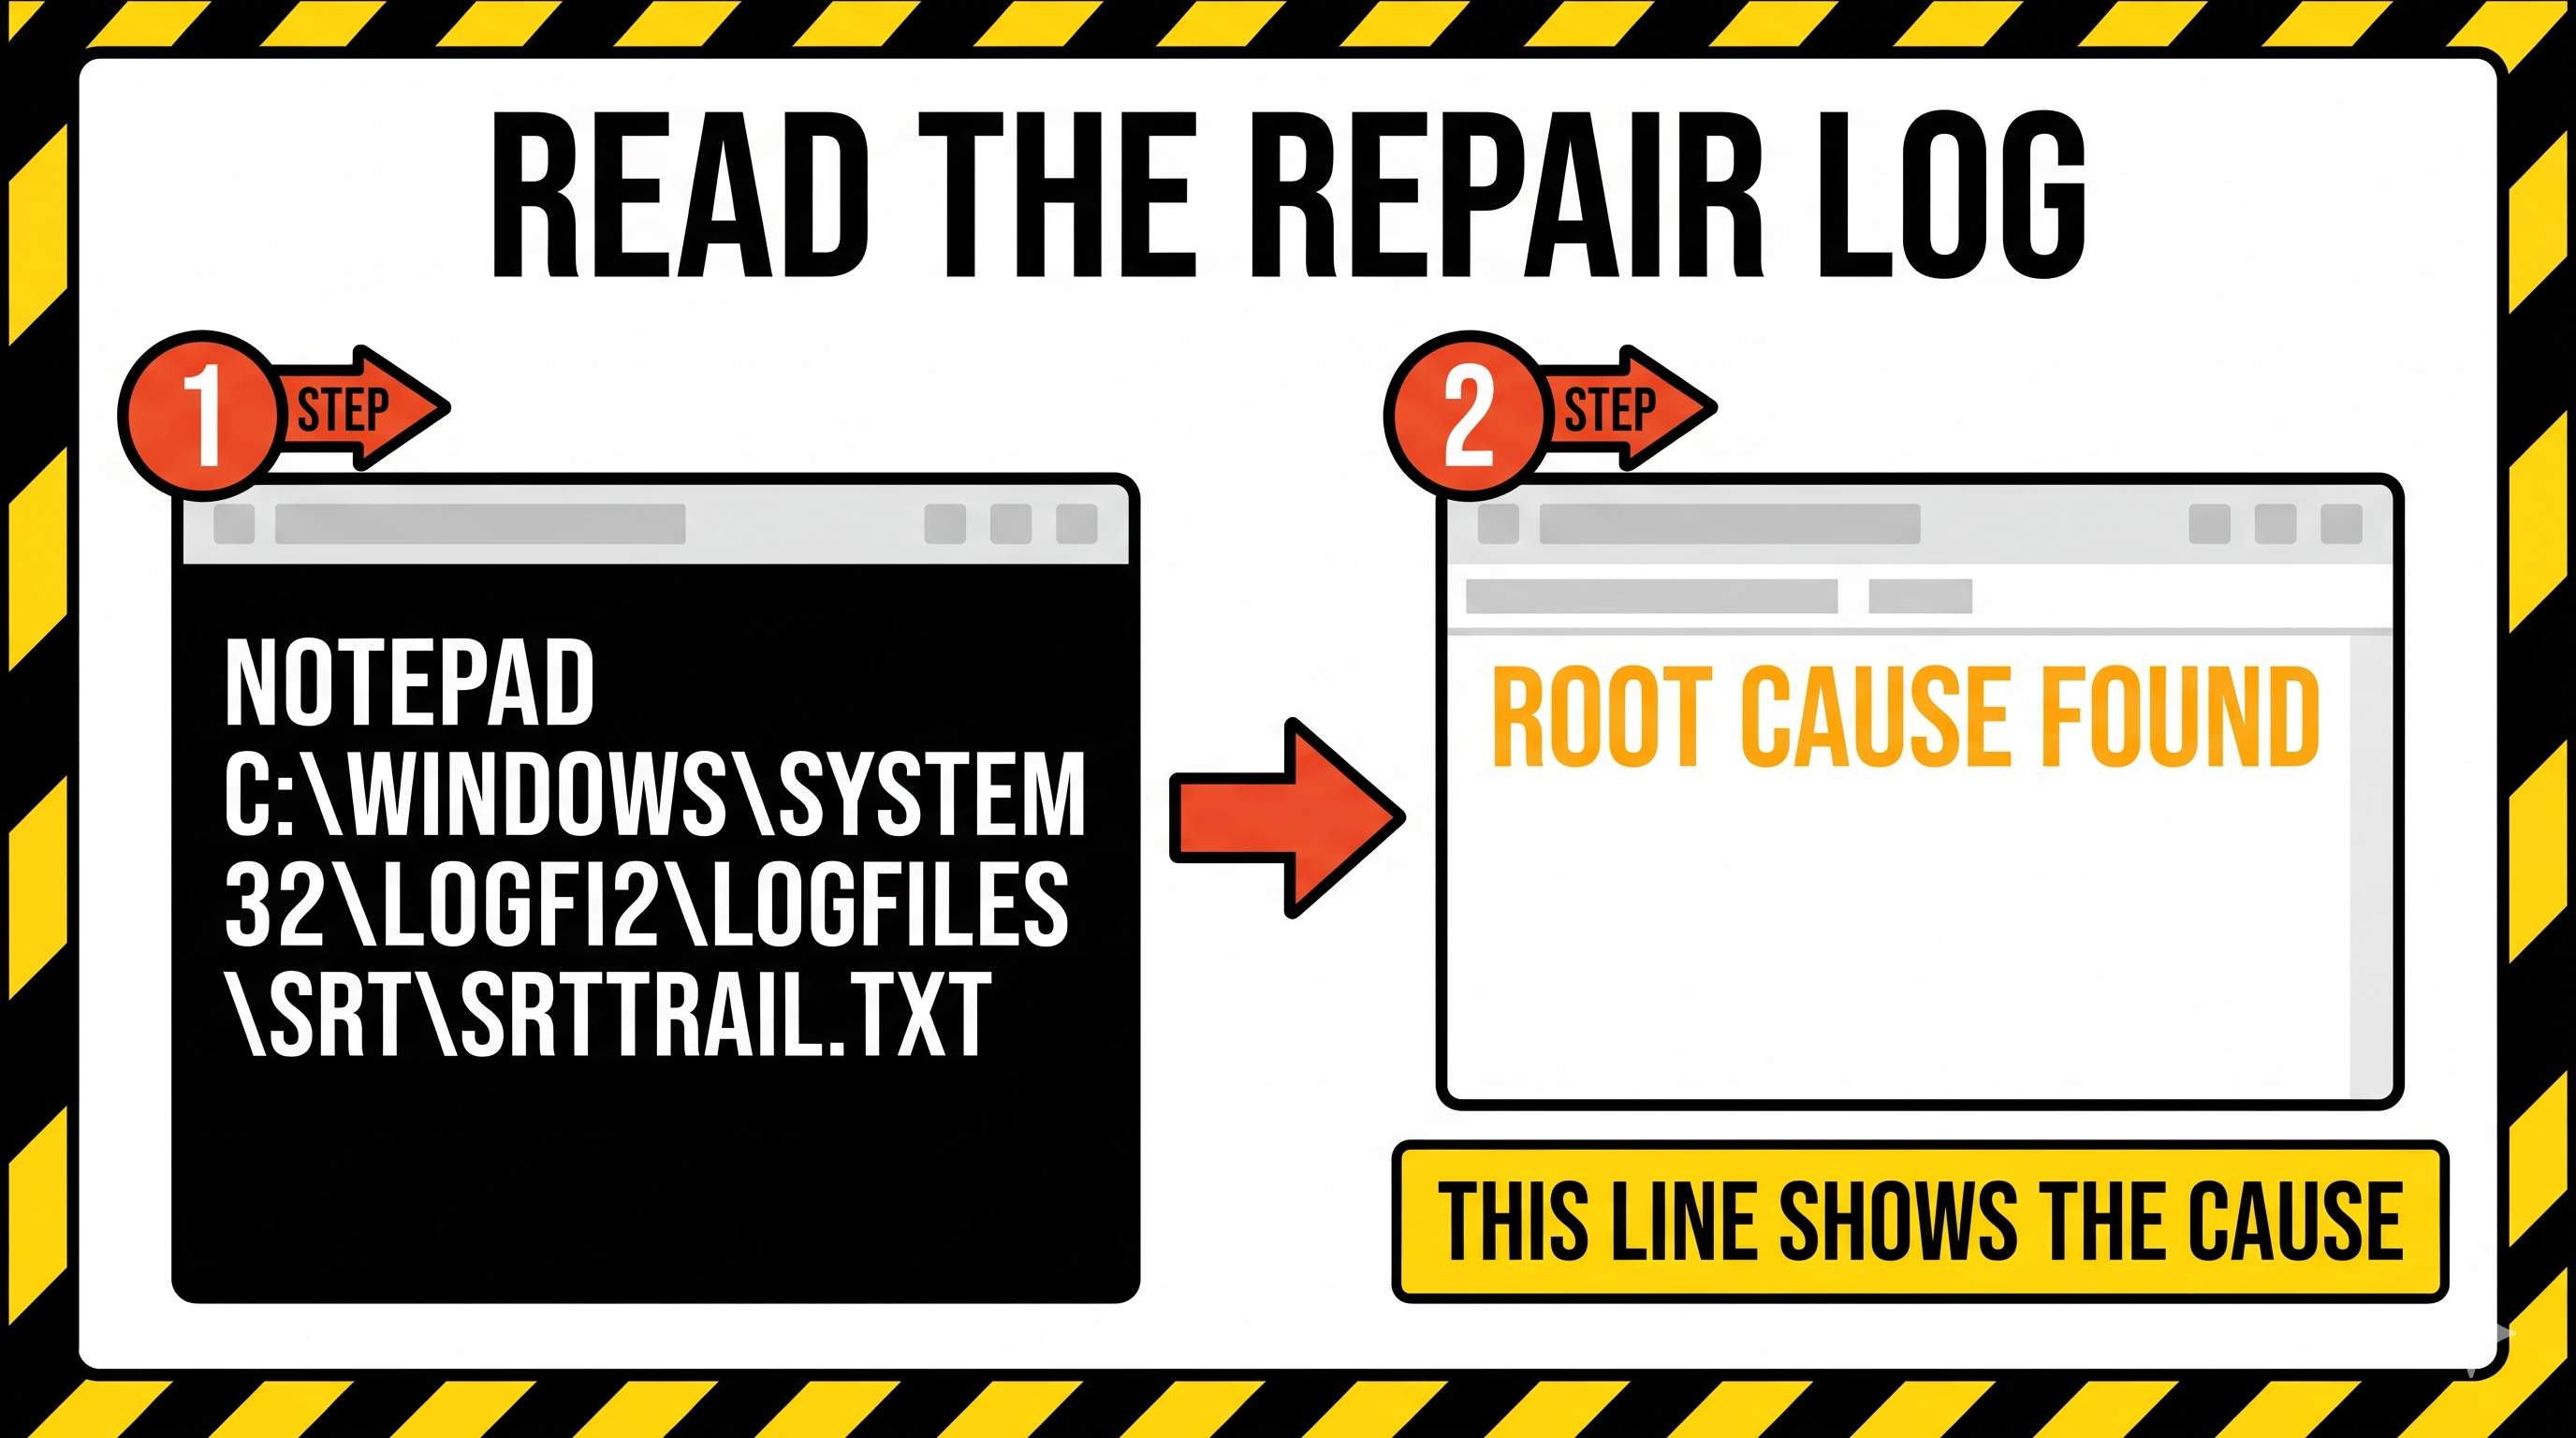
If it names a file from a program you installed, uninstalling that program (or a driver rollback) is usually the fix. Do not delete Windows files unless a trusted guide for that exact file says so.
7Uninstall the latest Windows update10 minutes · Easy+
- Go to Troubleshoot → Advanced options → Uninstall Updates.
- Choose Uninstall latest quality update first and follow the steps.
- If it still loops, try Uninstall latest feature update.
Use this when the loop began right after an update.
8Change Startup Settings5 minutes · Easy+
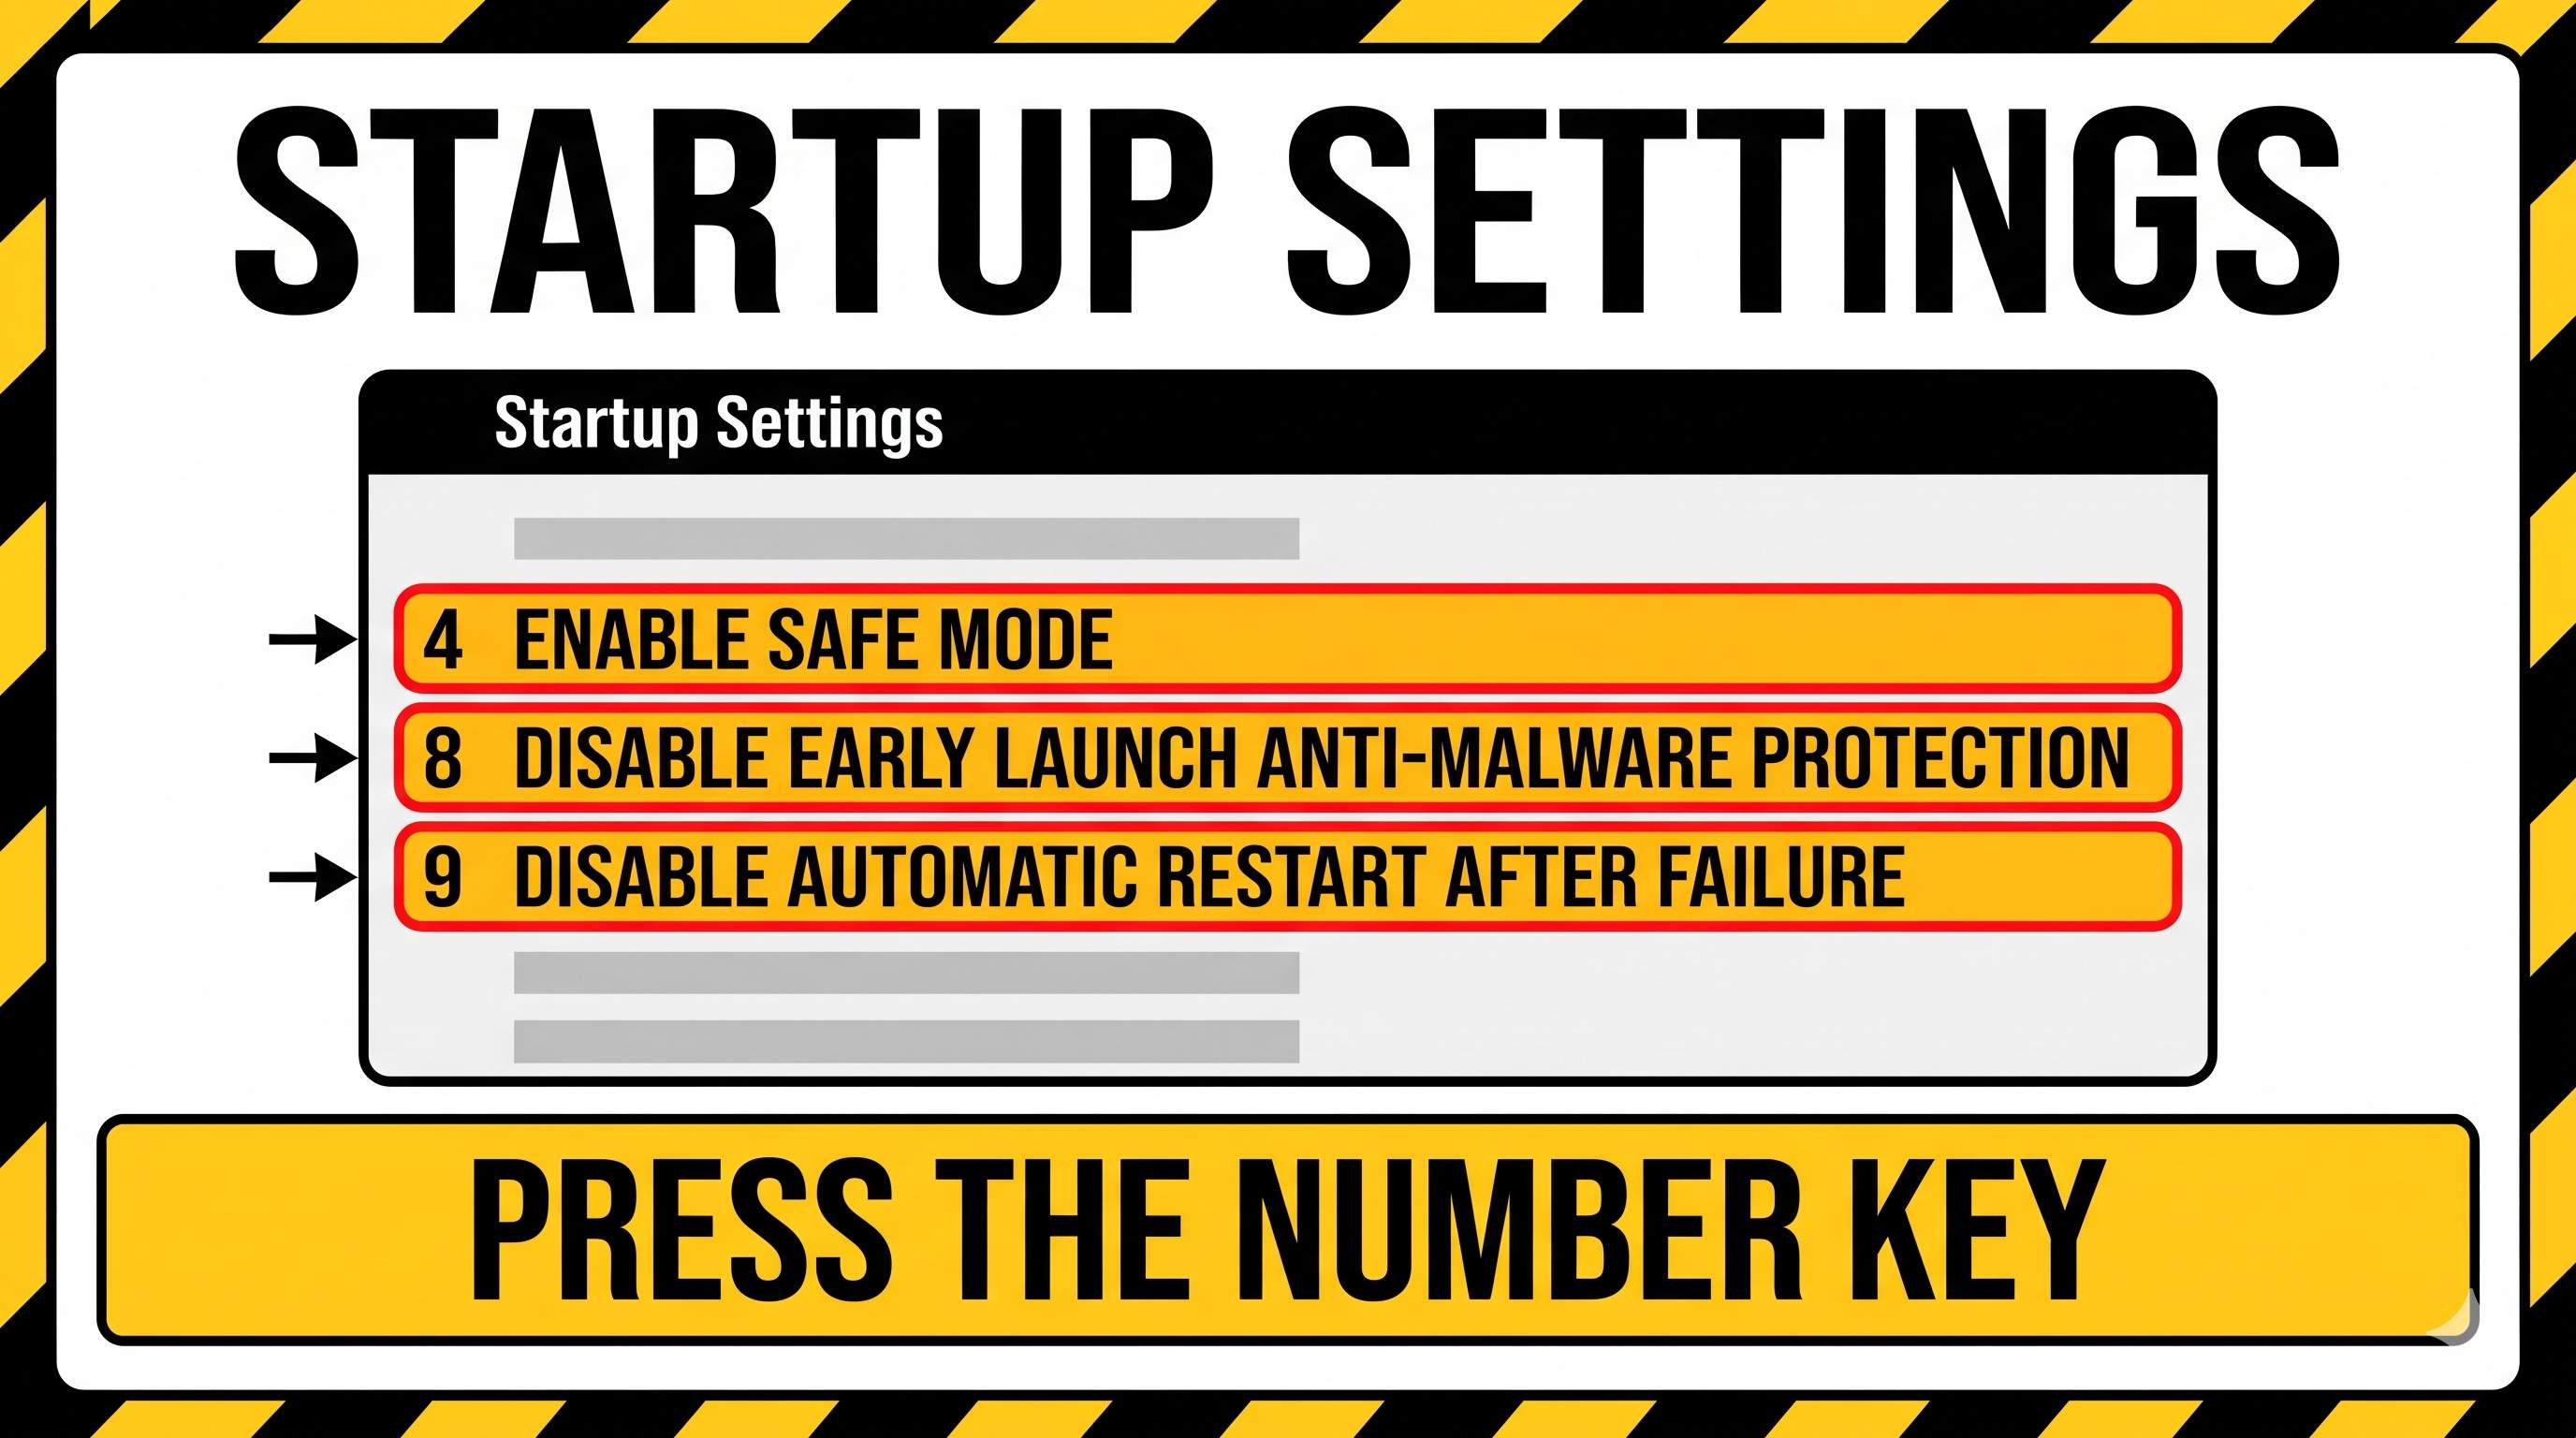
- Go to Troubleshoot → Advanced options → Startup Settings → Restart.
- Press 4 for Safe Mode. If Windows starts, restart normally and see if the loop is gone.
- If not, restart to Startup Settings again and try 8 (Disable early launch anti-malware protection), then 9 (Disable automatic restart after failure).
Booted into Safe Mode? Also try System Restore (rstrui) to go back to a date before the problem.
9Turn off automatic repair, then restore or resetLast resort · Advanced+
To stop the loop and see the real error, open Command Prompt from Advanced options and run:
bcdedit /set {default} recoveryenabled NoThen restart. Later, turn it back on with bcdedit /set {default} recoveryenabled Yes.
- Back up first: in Command Prompt type
notepad, use File → Open, right-click your files, copy them, and paste onto a USB drive. - Use Troubleshoot → Reset this PC → Keep my files.
- If that fails, do a clean install from a Windows USB. This erases the drive.
Frequently asked questions
What causes the Automatic Repair loop?
Common causes are damaged boot files, a failed Windows update, disk errors, a bad driver, or a failing drive.
Will I lose my files?
Usually not. Fixes 1 to 8 do not erase files. A reset with Keep my files is also designed to keep them, but back up first if you can.
How long should I wait at Preparing Automatic Repair?
Give it a good while, up to an hour, if the drive light is blinking. If nothing changes at all, force a shutdown and use Fix 2.
Can I fix it without a USB drive?
Often yes. Forcing shutdown 2 to 3 times opens the recovery menu with Advanced options, which covers most fixes.
Is the loop caused by a virus?
Rarely. It usually comes from update or boot file problems, not malware.
Why does the loop come back after I fix it?
A failing drive is the usual reason. Check the drive health and back up your files.
Other boot errors: HP 3F0 error, Dell “No bootable device found”, and the Boot & Startup Errors guide.
Still Stuck in the Loop?
If your PC cannot start Windows, remote support cannot connect to it. Contact us and we will tell you honestly what is needed.
Contact UsAbout the Author
ConfirmFix Editorial Team creates practical Windows troubleshooting guides to help readers understand common PC problems and follow step-by-step solutions.
Updated November 2, 2026. Menu names vary by Windows build and PC brand. Drive letters can differ in the recovery environment. Back up important data before running repair commands. ConfirmFix is an independent troubleshooting guide and is not affiliated with, endorsed by or sponsored by Microsoft. Windows is a trademark of Microsoft Corporation.
Pingback: Fix "Default Boot Device Missing or Boot Failed" on Lenovo: 9 Fixes (2026)
Pingback: Fix "Your PC Needs to Be Repaired" and Error 0xc00000e9 in Windows (2026)