How to Reduce Microphone Background Noise in Windows 11
Fans, keyboard clicks, hiss, hum, echo or a noisy room are spoiling your calls and recordings. This guide explains where microphone noise comes from and walks through every fix in plain language, from input volume and Voice Focus to Teams, Zoom, Chrome, Bluetooth and USB microphones, drivers, recording clean-up and work PC policies.
Quick Answer
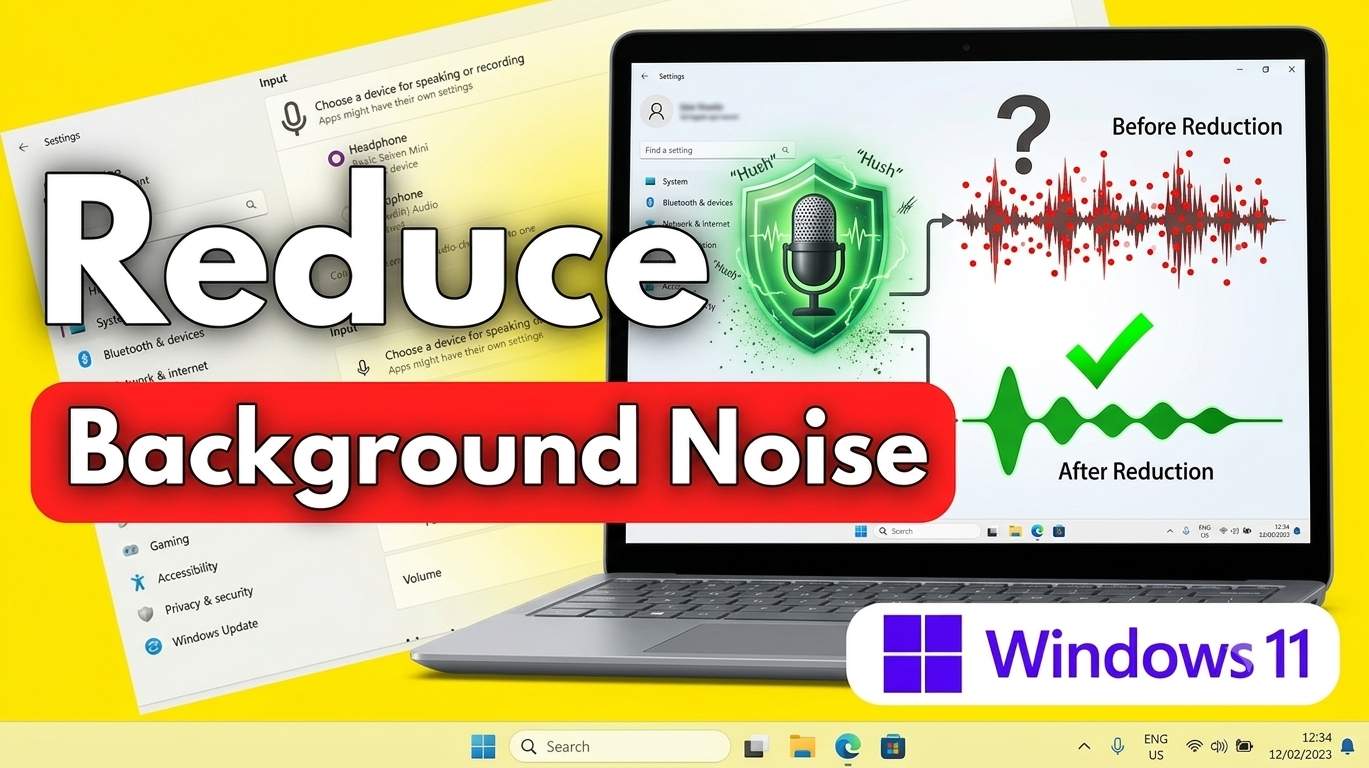
The fastest way to reduce microphone background noise in Windows 11 is to attack it in three layers, in this order. First fix the source: pick the correct microphone, move it closer to your mouth, and lower the input volume and any microphone boost so the mic is not amplifying the room. Second, switch on a noise-reduction feature: on Windows 11 version 24H2 and later, open Settings → System → Sound, click your microphone under Input, open Audio enhancements and turn on Voice Focus, and inside Microsoft Teams, Zoom, Google Meet or Discord, use the app’s own noise suppression setting. Third, if you are recording and not talking live, clean the file afterwards with a tool such as Audacity or your video editor.
Most people get a big improvement from just two changes, which are lowering the input volume (or boost) so that normal speech reaches roughly the middle of the level meter, and enabling one noise suppression option in the place where it matters, not several at once. Stacking Windows Voice Focus, a driver enhancement, an app setting and a third-party tool on top of each other usually makes your voice sound thin and robotic and can even add delay. If hiss, hum or crackle remains after the software steps, the cause is usually physical: a cheap or badly placed microphone, a Bluetooth headset using its low-quality hands-free mode, electrical interference on a USB port, or fans and keyboard clicks that sit right next to the mic.
The rest of this guide explains each step in plain language, including how to find out what kind of noise you have, how Windows’ own tools differ from app tools, and what to do for Teams, Zoom, Chrome, Bluetooth and USB microphones, gaming headsets, laptops from Dell, HP and Lenovo, work and school PCs, virtual machines, recordings for YouTube and video editing, and Windows 10.
Why Your Microphone Picks Up Background Noise
A microphone does not know the difference between your voice and everything else. It converts all air movement into an electrical signal, and the signal then passes through a chain: the microphone capsule, the cable or wireless link, a preamplifier that boosts the weak signal, the sound chip or USB interface that converts it to digital, Windows audio processing, and finally the app. Noise can enter at every step, and the fix depends on where it enters, so it helps to recognise the common types before changing settings.
Room noise is the sound of fans, air-conditioning, traffic, other people, a TV or a mechanical keyboard. It is real sound that reached the microphone through the air, so it can only be reduced by moving the microphone, using a directional or close-talking mic, or filtering it afterwards. Hiss is a steady “shhh” that gets louder when the input volume or boost is high, and it comes from the electronics in the microphone and preamplifier, so lowering the gain or using a better microphone helps most. Hum and buzz are low or buzzing tones, often from electrical interference, a ground loop between devices, a poor USB port or hub, or a charger, and they stay constant while you speak.
Crackle, static and dropouts point to a loose connector, a failing cable, a driver problem or Bluetooth interference. Echo and reverb come from a bare room with hard surfaces or from speakers feeding back into the mic, and they sound like speaking in a bathroom. Processing artefacts are noises created by software itself, such as robotic or underwater sounds from over-aggressive noise suppression, or pumping where the background rises and falls as the filter switches on and off. Knowing which of these you have tells you whether to adjust levels, change hardware, or relax a filter that is doing too much.
Noise Reduction, Noise Suppression, Noise Cancellation and Gain: What the Words Mean
These terms are used loosely, which causes confusion when you search for help. Gain (also called input volume, sensitivity or microphone boost) is how much the microphone signal is amplified, and it is the single most important setting for background noise, because a higher gain amplifies the room as much as your voice. Noise suppression and noise reduction usually mean software that detects background sound and turns it down while keeping speech, and noise cancellation in a microphone context normally means the same thing, although in headphones the term means something different, namely cancelling sound reaching your ears, which does nothing for what your microphone picks up.
In Windows 11, Microsoft’s main built-in feature is Voice Focus, part of Windows Studio Effects, which is available from Windows 11 24H2 and later. It comes in two versions, one that uses AI on a neural processing unit (NPU) on supported new PCs such as Copilot+ PCs, and one that uses software algorithms on other hardware. A separate option called Voice Clarity is a speech enhancement that appears on some devices, and it improves the tone and clarity of your voice and should not be confused with Voice Focus. Meanwhile, many apps ship their own filters, such as Teams noise suppression, Zoom’s suppress background noise, Google Meet noise cancellation, Discord’s noise suppression, and OBS filters, and drivers from Realtek, Intel, Dell, HP, Lenovo and others sometimes add their own too.
The key idea is that software can only do so much. It can reduce steady noise such as fans and hiss quite well, it is weaker with sudden sounds such as keyboard clicks or voices in the background, and it can never recover a voice buried under a loud room. Good placement and sensible gain make every filter work better, which is why the steps below start with the basics.
First, Test Your Microphone and Identify the Noise
Before changing anything, record a short sample so you can compare before and after. Open Settings → System → Sound, scroll to Input, and click your microphone to open its properties. You will see an input volume slider and a Test your microphone section with a Start test button, which shows a live level bar and reports a percentage of the result. Speak in your normal voice and watch the bar, and then stay silent for a few seconds and watch it again. If the bar moves a lot while you are silent, the background noise or the gain is too high.
For a recording you can listen to, open the Sound Recorder app that comes with Windows 11, record about ten seconds of silence followed by ten seconds of speaking, and play it back with headphones, not speakers. In the silence, listen for the type of noise: hiss, hum, fan, room, keyboard clicks or crackle. Then test the same microphone in a second app, for example Teams, Zoom or a browser based test, to see whether the noise is in the microphone itself or added by one app. Write down what you hear, because the type of noise decides which fix to use, and keep that first recording so you can compare it with the result after each change.
It also helps to make sure you are testing the right device. Many PCs list several inputs, such as the laptop’s built-in microphone array, a webcam microphone, a headset, a USB microphone and a virtual device from a conferencing or streaming app, and Windows may be using a different one from the one you think. The next section shows how to choose and confirm the correct input.
Fix 1: Choose the Right Microphone and Input Device
The first and most overlooked fix is selecting the correct input. Open Settings → System → Sound and look under Input. The active microphone has a filled dot beside it. Select the one you actually want, such as your headset or USB microphone, and speak while watching the level bar to confirm it responds. If you have several microphones connected, a laptop’s own built-in array is often the noisiest because it sits close to the keyboard and fan, and it also picks up the whole room, so switching to a headset boom microphone or a USB microphone placed near your mouth often cuts background noise more than any filter.
You can also use the classic sound control panel. Right-click the speaker icon in the taskbar, choose Sound settings, or use Sounds to open the older window and go to the Recording tab. Right-click the microphone you want and choose Set as Default Device and Set as Default Communication Device, then right-click any microphones you never use and choose Disable. Disabling unused inputs, such as a webcam mic or a second microphone array, stops apps from picking the wrong one. Also disable Stereo Mix if it appears, since it records what your speakers are playing and can feed echo back to other people. Inside each app, such as Teams or Zoom, the microphone is chosen again in the app’s own audio settings, so check it there too.
Fix 2: Lower the Input Volume, Microphone Boost and Sensitivity
Gain is the biggest lever you have. Too much gain makes the mic pick up fans, room tone and hiss, and it also causes clipping when you speak loudly. In Settings → System → Sound → Input, click your microphone and use the Input volume slider. A good starting point is to speak in your normal voice at your normal distance and adjust until the test bar moves roughly to the middle or three-quarters on normal speech without ever hitting the end. If you find you must set the slider very high to be heard, the better fix is to move the microphone closer to your mouth, not to raise the gain.
Many sound chips and USB microphones also include a separate Microphone Boost, which adds 10, 20 or 30 dB of extra amplification and is a major cause of hiss on laptops. Open the classic window from the taskbar speaker icon, go to the Recording tab, right-click the microphone, choose Properties, and open the Levels tab. Set Microphone Boost to 0.0 dB if you can be heard properly without it, or to the lowest level that works. Then set the microphone level itself to a moderate value. If there is no Levels tab or no boost control, your driver does not provide it, and the Input volume slider is all you have.
Also turn off any automatic gain feature that keeps raising the volume during quiet moments, because it makes background noise swell between your sentences. Some apps do this on their own, for example Zoom’s option to automatically adjust the microphone volume and Discord’s automatic input sensitivity, and the app sections below show where to disable it. After you change the gain, run the test again and compare it with your first recording to see whether the silence is quieter.
Fix 3: Turn On Voice Focus (Windows 11 Noise Cancellation) and Check Studio Effects
Windows 11 now has a built-in way to reduce background noise without any extra software. Voice Focus is part of Windows Studio Effects and is available on Windows 11 version 24H2 and later. To turn it on, open Settings → System → Sound, click your active microphone under Input, open Audio enhancements and switch on Voice Focus. You can also use Quick Settings: press Windows + A, click Studio effects, choose the microphone icon, and turn Voice Focus on. On a supported PC the same effects also appear under Settings → Bluetooth & devices → Cameras for your camera, where the camera and audio effects are grouped.
There are two versions of Voice Focus. The enhanced version uses AI running on the NPU, which is available on supported new PCs, notably Copilot+ PCs, and the other version uses software algorithms on PCs without an NPU. Which one you get depends on your hardware, and the feature is not available on every microphone, since it mostly applies to the internal microphone array and to devices whose drivers support it. If you do not see Voice Focus, check that you are on Windows 11 24H2 or later (press Windows + R, type winver, and press Enter), run Windows Update, check Optional updates for driver and component updates, and make sure the microphone you selected is the internal one. You do not need to download an ISO, reinstall Windows or join the Insider programme for this feature, and the Windows edition does not matter, so Home, Pro, Enterprise and Education are all treated the same way.
Try Voice Focus and then run the same test recording, listening for the room noise to drop without your voice sounding hollow. If your voice sounds strange, turn it off and rely on app-level suppression instead, since double processing is a common cause of robotic sound. Windows may also offer Voice Clarity on some devices, and you can test it separately, switching one effect at a time so you hear exactly what each does.
Fix 4: Use Audio Enhancements and Driver Noise Suppression (Control Panel, Realtek, Intel)
Beyond Voice Focus, many PCs offer older or driver-based enhancements. In Settings → System → Sound → Input, click your microphone and look at Audio enhancements. Options vary by driver and may include an on or off choice, a default effects mode, or named effects. For the classic view, open Control Panel → Sound (or right-click the taskbar speaker icon and choose Sounds), go to the Recording tab, right-click the microphone, choose Properties, and look for an Enhancements tab. On some drivers you will see choices such as Noise Suppression, Acoustic Echo Cancellation and Microphone Array options. Turn on noise suppression and echo cancellation if you hear room noise or echo, then test.
Manufacturer software can add more controls. Realtek systems often include a Realtek Audio Console, Intel systems use Intel audio components, and laptop makers add tools such as Dell Optimizer, HP’s audio utilities and Lenovo Vantage, some of which offer microphone noise reduction or voice enhancement on certain models. Open the one your PC has and look for microphone options. If you do not see enhancements, your driver or hardware simply does not provide them, which is common with generic USB devices. Also remember that enhancements are sometimes the cause of the problem: if the sound is full of artefacts, switching enhancements off for that microphone is a valid test.
On the same Advanced tab, look at the Default format and the exclusive mode option. A format of 48000 Hz at 16 bits is a safe, widely compatible choice for voice and for Bluetooth and USB devices. The Allow applications to take exclusive control of this device option lets one app override Windows settings, and if an app keeps resetting your levels, switch exclusive mode off. Finally, look at the Listen tab and make sure Listen to this device is not ticked, because it plays your microphone through your speakers and creates feedback that sounds like background noise.
Fix 5: Fix the Physical Setup: Distance, Position, Room and Microphone Type
Software cannot fully fix a bad setup, and the biggest improvement often costs nothing. Move the microphone closer to your mouth. Halving the distance roughly doubles the strength of your voice compared with the room, which means you can lower the gain and the noise drops with it. A headset boom should sit a thumb or two away from the corner of your mouth, not directly in front, to avoid breath popping. A desktop microphone should be about a hand’s width away (around 10 to 15 centimetres) for a close-talking mic, and should point toward you, not toward the fan or keyboard.
Think about the environment. Hard, empty rooms create echo, so soft furnishings, curtains, a rug, a bookshelf or even a blanket behind your screen reduce reverb. Turn off or move noise sources: switch off fans and air-conditioning during recording, close windows, and keep the mic away from a PC tower and laptop vents. If you use a gaming laptop, the cooling fans can be loud, so use a headset or external microphone and a quieter fan profile during calls. For keyboard clatter, use a headset that sits away from the keyboard, an external mic on a boom arm, softer keys, or press the mute shortcut while typing.
The type of microphone matters too. A dynamic microphone, common in podcasting and streaming, is less sensitive to distant sounds and so rejects room noise better than a condenser microphone, which captures more detail and more of the room. A cardioid pattern picks up mostly what is in front of it. A pop filter or foam cover cuts breath noise, and a shock mount or boom arm reduces desk vibration and keyboard thumps. A decent USB microphone or a headset with a good boom microphone is usually a bigger upgrade than any software, and you do not need to spend a lot. Avoid built-in laptop microphones for important recordings where you can, because they are far from your mouth and close to the noise.
Fix 6: Reduce Background Noise in Microsoft Teams (New Teams, Meetings and Calls)
Teams has its own noise suppression, and it works for calls and meetings in the same way. In the new Teams, open Settings (the three dots at the top) → Settings → Devices, and look for the Noise suppression option. The choices are normally Auto, Low, High and Off. Auto lets Teams decide, Low reduces steady background sounds such as a fan or keyboard hum, and High removes more noise but may affect the quality of your voice and can demand more processing power. Choose the setting that cuts your noise while keeping your voice natural, and test with a call to yourself or the test call option in the same Devices page. During a meeting you can also open More → Settings → Devices and adjust it live.
In the Devices page, also check that the correct microphone is selected instead of Default, and consider turning off any automatic microphone level adjustment if you find the noise swells between words. Use Teams’ mute button or the keyboard shortcut Ctrl + Shift + M to mute when you are not talking, and the Windows 11 shortcut Windows + Alt + K mutes and unmutes the microphone in supported apps. If you also enabled Voice Focus in Windows, try each setting alone and then together, since Teams noise suppression plus Windows suppression can sound over-processed. If the Teams option is missing or greyed out, your organisation may control it by policy, or your PC may not support the High level, and your IT team can tell you. Updating Teams and Windows also fixes many suppression bugs.
Fix 7: Reduce Background Noise in Zoom (Meetings and Calls)
In the Zoom desktop app, click your profile picture, choose Settings → Audio, and look at Suppress background noise. The usual options are Auto, Low, Medium and High, and a good approach is to start at Auto, move to Medium if you still hear fans or typing, and use High only in a very noisy place because stronger suppression can clip the start of words. Zoom’s Advanced audio settings also offer separate controls for persistent background noise (such as a fan or air conditioner) and intermittent noise (such as keyboard clicks or a door), so you can tune each one, and an option to show an in-meeting button for Original sound, which should be off if you want suppression applied.
Make sure Original sound for musicians is not switched on, because it turns off Zoom’s noise suppression and echo cancellation. Also untick Automatically adjust microphone volume in the same Audio settings if the noise level rises during quiet moments, and set the input level manually using the slider or Windows’ own input volume. You can run the Test Mic button in the same page to check how it sounds. To mute quickly, use the shortcut Alt + A. As with Teams, avoid stacking several suppressors, and if you use a headset with built-in noise suppression, try turning Zoom’s level down a step.
Fix 8: Chrome, Edge and Other Browsers, Google Meet and Web Apps
Web-based meetings and recorders use the microphone through the browser, so the browser must be pointed at the right device and allowed to use it. In Google Chrome, open Settings → Privacy and security → Site settings → Microphone and pick the correct input from the drop-down list, then check the site list for any blocked sites. In Microsoft Edge the same path is Settings → Cookies and site permissions → Microphone. You can also click the lock or tune icon in the address bar while on a meeting page and set the microphone for that site. If the browser keeps using a noisy built-in microphone, choosing the correct one here fixes it immediately.
Google Meet has its own Noise cancellation switch in the audio settings of the meeting, available on supported plans, and many web meeting tools have a similar toggle, so look in the audio or settings menu of whatever site you use. If the sound is poor only in the browser, try another browser, disable extensions that touch audio, update the browser, and restart it, since a stuck session can keep an old device selected. Websites such as a quick online microphone test let you hear the raw signal, which is useful for checking whether noise is in the microphone or in the meeting app. When a site cannot access the microphone at all, check Settings → Privacy & security → Microphone in Windows and make sure access is on, as covered later.
Fix 9: Third-Party Noise Removal for Gaming, Streaming and Discord (Krisp, NVIDIA Broadcast, OBS)
For gaming and streaming, several tools add stronger or more flexible noise removal. Discord has its own Noise Suppression option under Voice & Video, with a built-in AI-based setting and a standard setting, and it also has echo cancellation and automatic gain options that you may want to adjust. NVIDIA Broadcast uses the graphics card’s AI hardware on supported GeForce RTX cards to remove noise, and it creates a virtual microphone that you select in your game, Discord or meeting app. OBS Studio includes microphone filters: right-click your microphone source in the audio mixer, choose Filters, and add a Noise Suppression filter, with options such as RNNoise, Speex or, on RTX cards, NVIDIA noise removal, plus a Noise Gate that closes the microphone when you are not speaking.
Other paid and free tools exist, and they work in the same way by creating a virtual microphone that sits between your real microphone and the app. They are effective but add some processing delay, and they need to be selected as the microphone in each app, which is a common cause of “no sound” if forgotten. Download them only from the official website, avoid cracked versions and “keygen” downloads, since these are a well-known way to spread malware, and remember that a filter in a chat app already applies to what others hear, so do not stack the same type of filter twice. A noise gate helps with keyboard and mouse clicks between sentences, and a good starting point is to set the threshold just above the level of your background noise so that it opens when you speak.
Fix 10: Clean Up Recordings Afterwards: Audacity, Video Editors and Sound Recorder
If you are recording a video, a podcast, a YouTube voiceover, a screen or video recording, or radio-style audio, you can reduce noise after recording, often with better results than a live filter because the software can analyse the whole file. In Audacity, a free editor, record or import your audio, select a short section that contains only background noise (a second or two of silence at the start works well), open Effect → Noise Removal and Repair → Noise Reduction, and click Get Noise Profile. Then select the whole recording, open the same effect again, and apply it with moderate settings. Reduce by around 6 to 12 dB first and listen, because extreme settings create a watery sound. It helps to record a few seconds of room noise before you start talking, for exactly this purpose.
Many video editors have their own tools. Clipchamp, the editor that comes with Windows 11, and editors such as DaVinci Resolve and Adobe Premiere Pro offer audio clean-up or speech enhancement features, with names and availability that depend on the version and plan, so look in the audio panel of your editor for noise suppression, de-noise, voice isolation or enhance speech. Whatever you use, apply it on the voice track only, not the whole mix, and listen with headphones. The Sound Recorder app in Windows is useful for quick, simple recordings, and it records using the microphone settings you chose in Windows, so Voice Focus and your input volume apply to it too. Windows Media Player and other players only play audio, so they cannot remove noise from a file. For the best results, treat clean-up as a last step and fix the recording setup first, since heavy processing never matches a clean original recording.
Fix 11: Bluetooth Microphones and Headsets (Hiss, Low Quality and Delay)
Bluetooth headsets often sound worse as microphones than as headphones, and the reason is built into the technology. When a Bluetooth headset’s microphone is in use, many headsets switch to a hands-free profile that carries voice at a much lower quality than stereo music, so your voice sounds thin and noisy and the sound in your ears gets worse at the same time. In Windows 11, you may see two entries for the same headset, one labelled Stereo for music and one labelled Hands-Free or Headset for calls. Choose the hands-free microphone for talking, and check that the correct output is selected, since the wrong pairing leads to the “music became terrible when I joined a call” problem.
To improve things, keep the headset charged, stay close to the PC, and avoid crowded wireless environments, since busy 2.4 GHz Wi-Fi and USB 3 devices can interfere with Bluetooth and add crackle. Update the headset firmware using the maker’s app, for example Jabra Direct for Jabra headsets, and update the PC’s Bluetooth driver from Windows Update or the PC maker. Using the USB wireless dongle that comes with many gaming and office headsets often gives a better and lower-delay connection than the PC’s built-in Bluetooth. Newer Bluetooth LE Audio hardware can improve voice quality on supported headsets and PCs. If delay is a problem, remember that Bluetooth adds latency and noise suppression adds more, so a wired or dongle headset is the best fix for lip-sync problems.
Fix 12: USB Microphones, USB Ports, Hubs and Electrical Hum
A buzz, whine or hum that stays constant, or noise that changes when you move the mouse, charge a phone or turn something on, usually means electrical interference. Try a different USB port, ideally one directly on the PC and not on a hub or a front panel, because rear ports on a desktop connect straight to the motherboard and tend to be cleaner. Unplug other USB devices as a test, since USB 3 devices, hard drives and some chargers can create noise. Avoid long, thin cables, and use the cable that came with the microphone. On a laptop, running on battery and then on the charger can show whether the power adapter is the cause, and a different charger or a ferrite clip on the cable sometimes helps.
If you use a 3.5 mm analogue microphone or headset connected to the PC’s sound chip, hiss and hum are more common because that input is low quality and close to other electronics. A USB microphone or a USB audio adapter has its own conversion circuitry and avoids most of this, so it is the usual cure for analogue noise. Ground loops, which produce a hum when two grounded devices are connected, can be reduced by plugging devices into the same power strip or by using a ground loop isolator on an analogue connection. Finally, check the USB power settings: in Device Manager, open the USB root hub properties, look at Power Management, and untick Allow the computer to turn off this device to save power if the microphone drops out or crackles.
Fix 13: Update, Roll Back or Reinstall the Audio Driver
Crackle, strange noise, missing enhancements or a microphone that suddenly got noisy after an update often points to the audio driver. First install pending updates in Settings → Windows Update, including Advanced options → Optional updates, where driver updates often wait. Then open Device Manager (right-click Start and choose it), expand Audio inputs and outputs and Sound, video and game controllers, right-click your audio device, and choose Update driver. Better still, download the audio driver from your PC maker’s support page (Dell, HP, Lenovo, ASUS, Acer or Microsoft Surface), since the maker’s version is tuned for your microphone array.
If the problem began after a driver update, right-click the device, choose Properties → Driver → Roll Back Driver, restart, and test. If that is not available, choose Uninstall device, tick the option to delete the driver software only if you plan to install a fresh one, and restart so that Windows reinstalls the audio driver. To see which audio devices Windows considers active, you can list them with this command.
Get-PnpDevice -Class AudioEndpoint | Where-Object Status -eq "OK" | Format-Table FriendlyName, Status -AutoSize
If the problem remains, the cause may be damaged system files, and the standard repair is to run DISM /Online /Cleanup-Image /RestoreHealth followed by sfc /scannow in an administrator window. Restart afterwards, and test the microphone again.
Fix 14: Run the Recording Audio Troubleshooter and Use Command Line Shortcuts
Windows has a built-in troubleshooter for microphones. Open Settings → System → Troubleshoot → Other troubleshooters, find Recording Audio, and press Run. It checks the selected device, the audio service and basic settings, and can fix problems such as a disabled device or a muted input. It will not remove noise from a good signal, but it is a useful step when the microphone behaves unpredictably. Where the troubleshooter is not listed, the Get Help app offers a similar guided audio check.
There is no official command that turns noise suppression on, because those controls live in settings and drivers, but the command line is useful for opening the right place quickly and for restarting a stuck audio service. These work in Command Prompt (cmd), in Terminal and in the Run box, so if you were searching for a way to do this using cmd, this is what the command line can and cannot do. The first opens the Sound settings page, and the second opens the classic window on the Recording tab.
start ms-settings:sound
control mmsys.cpl,,1
If sound or the microphone misbehaves and a restart is inconvenient, restart the Windows Audio service from an administrator PowerShell or Terminal window, which clears many temporary glitches, such as a microphone that stopped responding or a level that keeps resetting.
Restart-Service -Name Audiosrv -Force
Registry edits and “hidden” settings are not recommended for noise reduction, because the effect is small and a wrong change can break audio, so use the settings pages above instead.
Fix 15: Settings That Reset at Startup, and Audio Delay
If your microphone settings change back after a restart or whenever you start a certain app, something is overriding them. Common causes are conferencing and chat apps that automatically adjust the microphone level (Zoom, Discord, Teams and browser based meeting tools), exclusive-mode apps that take control of the device, manufacturer audio software that applies its own profile at login, and a Windows or driver update that replaced your driver and reset enhancements. Find the culprit by closing apps one at a time and checking whether the input volume stays where you set it. Then disable automatic gain in the offending app, untick exclusive control in the device’s Advanced tab, and check the manufacturer’s audio app for a startup profile. Look in Task Manager → Startup apps to see which audio tools start with Windows.
Delay, where your voice reaches other people late or you hear yourself late, comes from three places. Bluetooth adds latency, noise suppression filters and virtual microphones add processing time, and a heavily loaded PC makes it worse. To reduce delay, use a wired or dongle headset, avoid stacking several filters and virtual devices, close heavy apps, and make sure Listen to this device is off, since that creates an echo of your own voice. If a virtual microphone from a noise tool introduces noticeable lag, test with it off and see whether Windows Voice Focus or the app’s own suppression gives acceptable quality with less delay.
Fix 16: Check Privacy Settings, Windows Version and Updates
If a microphone does not work in an app, or does not appear in the list, check access. Open Settings → Privacy & security → Microphone and make sure Microphone access and Let apps access your microphone are on, then check the list of apps and allow the one you need. The same page shows recent activity, which tells you which apps used the microphone lately. If you see an app you do not recognise using the microphone, treat it seriously, since unwanted software and a virus or spyware can use a microphone, so run a full scan with Windows Security and remove anything you do not trust. A small microphone icon in the taskbar also shows when an app is using the microphone.
Next, check the version. Voice Focus needs Windows 11 24H2 or later, so run winver to see yours, install pending updates, and look at optional updates. If a problem began right after an update, you can open Settings → Windows Update → Update history → Uninstall updates as a test, but do this carefully, because security updates matter. Beta and preview builds can change or break audio features, so use the Insider channels only on a spare PC. On all editions, including Home, Pro, Enterprise and Education, the noise tools work the same way, and you do not need to reinstall Windows or download an ISO to get them.
Work and School PCs: Policies, Education and Enterprise Editions, Virtual Machines and Remote Desktop
On a managed PC, the options you expect may be missing or locked. Organisations can control Teams noise suppression and device settings through Teams policies, manage Windows through Microsoft Intune or Group Policy, and restrict which audio tools you can install, and Education and Enterprise editions are commonly managed this way. If a setting is greyed out, or an app’s noise suppression is missing, ask your IT team. If you manage Macs, note that tools such as Jamf Pro control macOS devices, which use a different system (macOS has its own voice isolation option), so these Windows steps do not apply there.
In virtual machines and remote sessions, the microphone is passed through from the host, and many noise problems are caused by the pass-through. In VirtualBox, open the VM’s Settings → Audio and enable audio input, then select the correct host device; in VMware and Hyper-V, check the audio and device redirection options. In Remote Desktop, turn on Remote audio recording in the connection’s Local Resources tab, and expect more delay and lower quality than a local microphone. Citrix, VDI and other thin-client setups often process noise on the host, so test on the host or ask the administrator which noise settings apply. For anything important, record locally and not through a remote session.
Laptops and Brands: Dell, HP EliteBook, Lenovo, Surface, Gaming Laptops and Intel Hardware
Laptop microphones are small arrays near the camera, designed to pick up your voice and filter the rest using software. That software lives in the driver and in the maker’s utilities, so the quality differs by model. On Dell, HP and Lenovo business laptops, such as the HP EliteBook range, look for the maker’s audio or collaboration software, such as Dell Optimizer, HP audio utilities and Lenovo Vantage, which may include microphone noise reduction, voice enhancement or meeting profiles on supported models. Surface devices and new PCs with an NPU, including many with recent Intel Core Ultra processors, support the more advanced Windows Studio Effects features, such as AI-based Voice Focus.
Gaming laptops have extra challenges because their fans are loud and their microphones sit close to hot, noisy components. Their audio suites, such as Nahimic or Sonic Studio on some models, include their own noise suppression, and these can conflict with Windows or app settings, so use only one. For gaming laptops, the best fix is an external headset or USB microphone, a lower fan profile during calls and a stand that lifts the laptop away from the keyboard. If audio stopped working properly after installing a new driver or a customization tool, roll back the driver. Skin packs, transformation packs, wallpaper and theme tools do not change microphone noise, but they can break Quick Settings or the taskbar sound controls, so remove one if the Studio effects tile or sound menu behaves strangely.
Special Cases: Webcam Mics, Phone as a Microphone, Meta Quest 3 and Displays with Built-In Mics
Webcam and camera microphones are usually cheap and far from your mouth, so they pick up a lot of room. Select them in Windows only if you have nothing better, lower the input volume, and consider disabling them in the Recording tab if you use a headset. A phone as a microphone is possible with reputable apps that stream the phone’s microphone to the PC over Wi-Fi or USB, and it often sounds better than a laptop mic because the phone can be held close to your mouth, but it adds delay and needs the app running on both devices, and the virtual device must be selected in your apps.
Meta Quest 3 headsets used with a PC through Quest Link or Air Link have their own microphone, and Windows may show it as a separate input, often named after the Oculus or Meta virtual audio device. Select it in Windows or in the Meta app’s audio settings, and expect some room noise since the microphone sits near your face but also picks up fan noise and breath. Some monitors and displays with built-in microphones, including Apple’s Studio Display, usually act as ordinary USB microphones on Windows, so they may not give the voice processing you would get on a Mac, and you may need Windows Voice Focus, an app’s suppression or a separate microphone. Developer tools such as Visual Studio, and the voice or dictation features inside them, normally use the default Windows microphone and have no noise filter of their own, so the Windows steps above are the ones that matter there. Windows Hello settings are about face and fingerprint sign-in and have no effect on microphone noise, although on many laptops the camera module that supports Hello sits close to the microphone array. In every special case, the same method applies: pick the right input, set the gain properly, and add one noise filter at a time.
Keyboard Noise, Keyboard Shortcuts and Right-Click Shortcuts for the Microphone
Keyboard noise is one of the most common complaints, and it is hard for software to remove because clicks are short and sharp. The most reliable answers are physical: use a headset or a mic on a boom arm that is not on the desk, soften the keys, or mute while typing. Shortcuts make muting easy. Windows + Alt + K toggles the microphone mute in supported apps, Ctrl + Shift + M mutes in Teams, Alt + A mutes in Zoom, and many apps and games offer push-to-talk, which opens the microphone only while you hold a key, and avoids sending background noise at all. In Discord and many games, push-to-talk is the strongest noise fix for noisy environments.
For settings, Windows + I opens Settings, Windows + A opens Quick Settings, and Windows + R lets you type mmsys.cpl to open the classic Sound window. For quick access to the sound controls, right-click the speaker or volume icon in the taskbar to reach Sound settings, Sounds and the troubleshooter quickly. On Windows 11 the taskbar sound icon opens the Quick Settings panel, where a volume slider and, on supported PCs, a Studio effects tile appear. If a right-click menu entry is missing, use Settings instead. These are quick tools for testing: try muting, adjusting the level, and flipping a single setting while listening, and you will find the cause faster than by guesswork.
Windows 10 Differences and the End of Support
Windows 10 does not have Voice Focus or Windows Studio Effects, so noise reduction there relies on the microphone’s driver enhancements, on app-level suppression in Teams, Zoom, Meet or Discord, on third-party tools, and on clean-up afterwards. The input and level settings are under Settings → System → Sound → Input → Device properties and the classic Sound control panel, with the same Levels, Enhancements and Advanced tabs described above, and the troubleshooter is under Settings → Update & Security → Troubleshoot → Additional troubleshooters → Recording Audio.
Microsoft ended regular support for Windows 10 on October 14, 2025, unless you are enrolled in Extended Security Updates. Microphones and apps continue to work, but new features such as Voice Focus come only to Windows 11, so if your PC supports it, upgrading is the best way to get built-in noise reduction. If it does not, rely on app-level suppression, a better microphone and, when needed, a trusted third-party tool.
Common Mistakes That Make Noise Worse
The first mistake is raising the input volume to compensate for a distant microphone. It makes the noise louder along with your voice, and it is much better to move the mic closer. The second is stacking suppressors, for example Windows Voice Focus plus a driver enhancement plus Teams High plus a third-party virtual microphone. Each filter changes the sound, and together they can make your voice robotic, sometimes with pumping noise and clipped word starts. Use one main suppressor and keep the others off or on low settings.
The third mistake is leaving Listen to this device on, or using speakers with a sensitive microphone, which creates echo and feedback that people describe as noise. The fourth is using a Bluetooth headset’s hands-free microphone and expecting studio quality. The fifth is ignoring the room: no software fully fixes a loud fan right next to the mic. The sixth is downloading “noise remover” software from unknown sites or using cracked versions with keygens, which risks malware, and the last is changing many settings at once so that you never learn which one helped. Change one thing, test, and keep what works.
Best Settings by Situation
For Teams or Zoom calls on a laptop: use a headset with a boom microphone if you can, set the input volume so that speech reaches about the middle of the meter, turn off microphone boost if possible, and use the app’s own noise suppression set to Auto or Medium, with Windows Voice Focus off unless you prefer it. If you have no headset, enable Voice Focus on a Windows 11 24H2 PC and test whether it sounds natural.
For gaming and Discord: use a headset or USB microphone, set Discord’s noise suppression on, consider push-to-talk, and set a noise gate if you stream. Avoid Bluetooth hands-free for competitive play because of the delay. For recording video, podcasts or YouTube voiceovers: use a dynamic or well-placed USB microphone, record at a moderate level with room noise as low as possible, capture a few seconds of silence for a noise profile, and clean the file in Audacity or your editor, leaving live noise suppression off so that you keep the highest quality recording. For a noisy open office: a close-talking headset microphone with a boom, Teams noise suppression on High or Auto, and a mute shortcut will beat any laptop microphone setup.
What Other Users Report: Patterns Worth Knowing
Reading user guides and forum threads shows a few repeating patterns. The first is confusion about Voice Focus, where people cannot find it because they are on an older Windows 11 version, or because their hardware or driver does not support it, and the answer is to check the version, update Windows and drivers, and use the internal microphone. The second is over-suppression: users enable several filters and then complain that their voice sounds robotic, cuts out or has a metallic tone, and the answer is to turn off all but one. The third is Bluetooth: many people blame Windows when the cause is the headset’s hands-free profile, which gives low-quality voice, and the answer is a wired or dongle connection or a separate microphone.
The fourth pattern is a noise problem that appears after an update, which is usually a changed driver or reset enhancement, and rolling back the driver or reinstalling the manufacturer’s version solves it. The fifth is levels that keep changing at startup, caused by apps with automatic gain or exclusive mode, and the sixth is interference from USB ports, hubs and chargers. Matching your symptom to one of these patterns saves a lot of time.
How to Keep Your Microphone Clean and Quiet
Good habits prevent most noise problems. Choose a decent microphone and place it close to your mouth. Set the gain once, with a test recording, and leave it. Keep your drivers, Windows and apps updated, but note the version of a working driver so you can roll back if an update breaks things. Use one noise suppression setting in the place where it counts, and avoid stacking many. Mute when you are not talking, which is the simplest and most effective noise reducer of all, and use push-to-talk in noisy rooms. Keep fans and keyboards away from the microphone, and record a few seconds of silence at the start of any recording for later clean-up.
Finally, test before important calls and recordings, using the Windows Test your microphone button or Sound Recorder, and not during the call itself. A thirty-second check with headphones on can save an embarrassing meeting, and if you keep a note of the settings that work for each microphone, you can restore them quickly after an update or a new PC.
Frequently Asked Questions
How do I reduce microphone background noise in Windows 11?
Pick the correct microphone, move it closer to your mouth, lower the input volume and any microphone boost, and then turn on noise reduction. On Windows 11 24H2 or later, open Settings, System, Sound, click your microphone, open Audio enhancements and turn on Voice Focus. Inside Teams, Zoom or Meet, also use the app’s noise suppression.
How do I turn on noise cancellation for my microphone in Windows 11?
Go to Settings, System, Sound, select your microphone under Input and open Audio enhancements, then switch on Voice Focus. You can also press Windows plus A and use the Studio effects tile in Quick Settings. Voice Focus needs Windows 11 24H2 or later, and it works best with the internal microphone.
Why is there no Voice Focus option on my PC?
You may be on an older Windows version, your hardware or driver may not support it, or you may have selected a microphone that the feature does not apply to. Run winver to check for 24H2 or later, install Windows and optional driver updates, and select the internal microphone array.
Why does my microphone have static, hiss or a buzzing sound?
Hiss is usually high gain or boost, or a low-quality microphone input. Buzz or hum is usually electrical interference from a USB port, hub, charger or ground loop. Crackle can mean a bad cable or driver. Lower the gain, try another port or cable, update the driver, and consider a USB microphone.
Which is better, Windows noise suppression or Teams and Zoom suppression?
Use one main suppressor, usually the app’s own, because it is tuned for meetings. Windows Voice Focus is useful across all apps and for recordings. Stacking several filters often makes your voice sound robotic, so try each alone and keep the one that sounds most natural.
How do I reduce noise on a Bluetooth headset microphone?
Bluetooth headsets switch to a low-quality hands-free profile when the microphone is active, so some hiss and thinness is normal. Keep the headset charged and close, update its firmware, use the wireless USB dongle if one came with it, or use a separate wired or USB microphone for better quality.
How can I remove background noise from a recording after I have made it?
Use an editor. In Audacity, select a section with only background noise, choose Effect, Noise Removal and Repair, Noise Reduction, click Get Noise Profile, then apply the effect to the whole recording at moderate settings. Many video editors also have a noise suppression or speech enhancement tool.
Why does my microphone setting change after I restart Windows?
An app or driver is probably overriding it. Conferencing and chat apps can adjust the level automatically, exclusive-mode apps can take control, manufacturer audio software can apply a startup profile, and an update can replace a driver. Disable automatic gain and exclusive mode, and check startup apps.
Does noise suppression add delay to my voice?
It can add a little processing delay, and virtual microphone tools and Bluetooth add more. Use a wired or dongle headset, avoid stacking filters, and make sure Listen to this device is off. If delay is noticeable, test with the extra filter off.
Does this work on Windows 10?
The level, enhancement and app-level steps work, but Voice Focus and Windows Studio Effects are Windows 11 features. Windows 10 support ended on October 14, 2025, so consider upgrading to Windows 11 if your PC supports it.
Bottom Line
Reducing microphone background noise in Windows 11 is mostly about doing the simple things in the right order. Choose the correct microphone, bring it close to your mouth, and lower the gain and any boost so that speech sits around the middle of the meter. Then turn on one noise-reduction feature where it matters: Voice Focus in Windows 11 24H2 or later, or the noise suppression in Teams, Zoom, Meet or Discord, and avoid stacking several. Fix the hardware causes, such as a Bluetooth hands-free microphone, a noisy USB port or a fan next to the mic, and keep drivers and Windows current.
If you are recording, add a clean-up step in Audacity or your editor, and if you are on a work or school PC, remember that policies may control some settings. Change one thing at a time, listen to a test recording after each change, and stop when it sounds natural, because the goal is a clear voice and not a silent room. A good headset or USB microphone is the best long-term upgrade, and with the right settings even a modest setup can sound clean and professional.