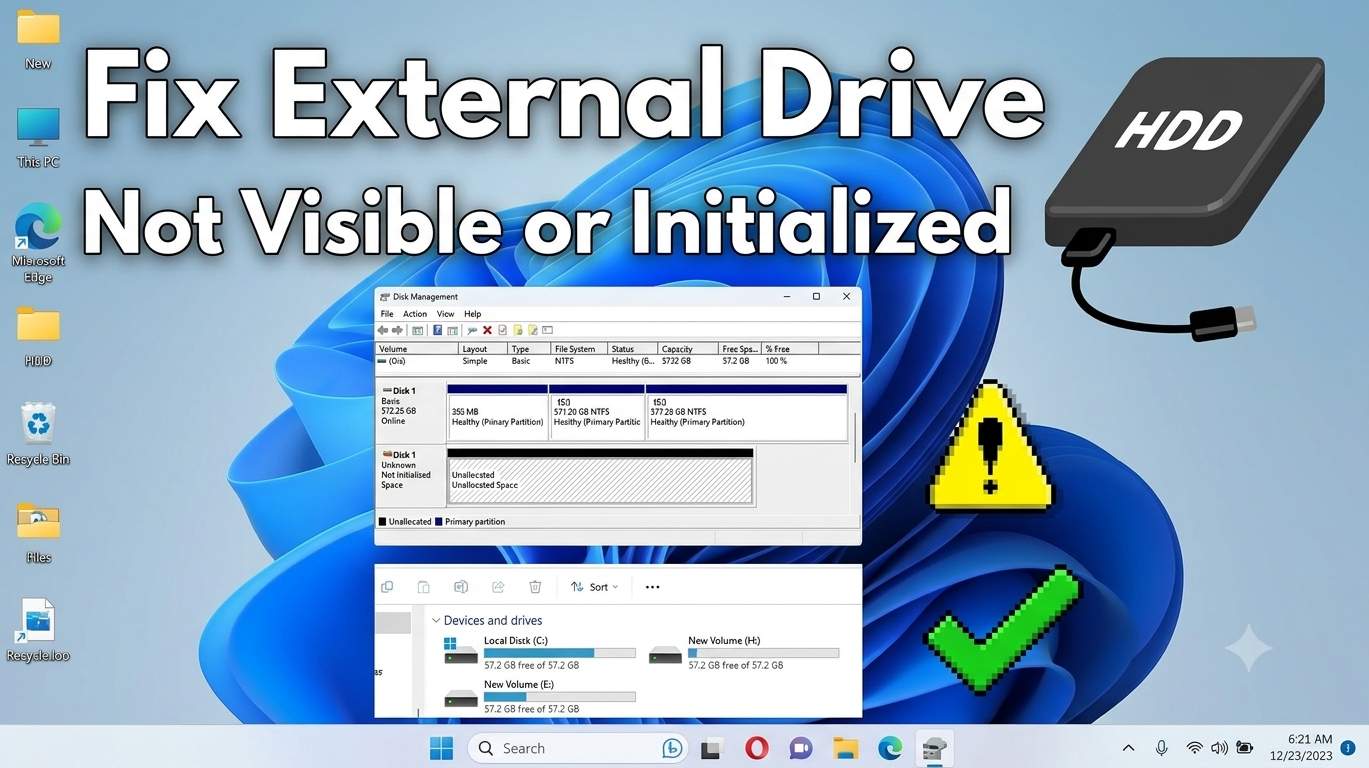
Quick answer
Most drives that Windows 11 does not detect are fixed in the first four steps.
Unplug the drive and restart the PC. Try the original cable in a rear USB port, plugged straight into the PC. Open Disk Management (right-click Start). If the disk is listed without a drive letter, add one. If it says RAW, Not Initialized or asks to be formatted, do not format. Recover your files first.
- Power-cycle the drive and PC, then read the light (Fix 1).
- Swap the cable and port, skip hubs and front-panel ports (Fix 2).
- Open Disk Management and read the state of the disk (Fix 4).
- Add a drive letter or bring the disk online (Fix 5).
- Check for a lock or a Mac, Linux or console format (Fix 10 and Fix 11).
- Recover files before you repair or format (Fix 13 and Fix 14).
Five rules that protect your data
- Do not format, initialize or create a new volume just because Windows offers to. That can erase the only copy.
- If the drive clicks, grinds or beeps, unplug it. Do not run chkdsk or recovery software.
- Always recover files to a different drive, never onto the damaged one.
- Run chkdsk only on a drive that is quiet and stays connected.
- Never use diskpart
cleanunless you have checked the disk number and your files are safe elsewhere.
Diagnose your drive in 30 seconds
Answer up to three questions. You get the fixes that match your situation, in the right order.
Decoders: what Windows is telling you
Two lookup tables. The first reads the state of the disk in Disk Management. The second reads Device Manager and File Explorer messages.
Disk Management states
| In Disk Management you see | What it usually means | Are your files safe? | Go to |
|---|---|---|---|
| The disk is not listed at all | Windows is not receiving the drive: power, cable, port or driver | Nothing has changed | Fix 1, Fix 2, Fix 3, Fix 6 |
| Not Initialized (black header) | No valid partition table: new, damaged or from another system | Files may exist. Do not initialize if you need them | Fix 11, Fix 13, Fix 14 |
| Unallocated (black bar) | No partition: deleted, damaged or a brand-new drive | Recoverable until new data is written | Fix 13, Fix 14 |
| RAW file system | Windows cannot understand the file system | Often recoverable | Fix 11, Fix 13, Fix 14 |
| Healthy, but no drive letter | Mounted, but nothing has assigned a letter, or it clashes | Safe | Fix 5 |
| Offline | The disk was set offline or its signature clashes | Safe | Fix 5 |
| Foreign | A dynamic disk from another PC | Safe | Fix 5 |
| Padlock or locked volume | BitLocker or maker encryption | Safe, but needs the key | Fix 10 |
| Healthy, but Explorer says: format the disk | Windows cannot read the file system | At risk if you format | Fix 11, Fix 13 |
| No Media, 0 bytes or Unknown | The bridge cannot read the disk. Often power or a failing drive | Unknown | Fix 1, Fix 2, Fix 15 |
Device Manager and File Explorer messages
| Message or error | What it usually means | Go to |
|---|---|---|
| Unknown USB Device (Device Descriptor Request Failed), Code 43 | Windows cannot read the device's identity: power, cable, port or a failing bridge | Fix 2, Fix 3, Fix 7, Fix 6, Fix 8 |
| Code 10: This device cannot start | The driver loaded but cannot start the device | Fix 6, Fix 8 |
| Code 28: drivers are not installed | No matching driver | Fix 8 |
| Code 31: Windows cannot load the drivers | A driver file is damaged | Fix 6, Fix 8 |
| USB Device Over Current Status Detected, or a power surge on the port | The drive asks for more power than the port gives, or a cable is shorted | Fix 1, Fix 2 |
| This USB device can transfer data faster | A fast drive is on a slow port. It works, but slowly | Fix 2 |
| You need to format the disk before you can use it | Windows cannot read the file system. Do not click Format | Fix 11, Fix 13, Fix 14 |
| The file or directory is corrupted and unreadable | A damaged file system | Fix 12, Fix 13 |
| Location is not available. Access is denied | Encryption, permissions or a damaged file system | Fix 10, Fix 12 |
| The parameter is incorrect | A damaged file system or a flaky USB connection | Fix 12, Fix 13 |
Before you start
Two minutes of preparation prevents the most expensive mistakes.
The 15 fixes, in a data-safe order
Work from the top. Each fix is labelled Safe, Caution or Erases data, and the right-hand column shows what success looks like and what to do if it fails. Mark fixes as tried to track your progress.
Rule out power, cable and port
Quick, safe checks that solve most cases. Nothing in this phase touches your data.
1Power-cycle the drive and the PC, then read the lightSafeAbout 5 minutesFixes a stuck USB handshake
Use this when
The drive is not listed anywhere, the light is off or blinking, or it worked yesterday and vanished today.
Why it works
A USB drive and Windows negotiate power and speed when the drive is plugged in. If that handshake gets stuck, the drive stays invisible until both sides restart. The light and the sound also tell you whether the problem is power or something deeper.
Steps
- Save your work. Unplug the drive's USB cable. For a desktop drive, also unplug its power adapter.
- Shut the PC down fully (hold Shift while you click Shut down), wait 30 seconds, then start it again. Sign in before you plug the drive back in.
- Plug in the power adapter first (desktop drives), switch the drive on if it has a switch, then connect the USB cable.
- Read the light. Steady light means the drive has power. A light that blinks constantly and never settles can mean it keeps restarting from too little power. No light at all means no power or a dead cable.
- Listen. A soft spin-up hum is normal. Repeating clicks, grinding or beeps mean stop: unplug the drive and go to Fix 15. Do not keep retrying.
- Be patient. Large hard drives can take up to a minute to spin up and appear.
Desktop drives are built for a specific voltage, often 12 V. A wrong adapter can damage the drive's circuit board.
2Swap the cable, port, adapter and hubSafeAbout 10 minutesThe most common real cause
Use this when
The drive connects and drops, works in one port but not another, or never shows up at all.
Why it works
Drives are fussy about power and signal quality. A worn cable, a front-panel port, an unpowered hub or a USB-C to USB-A adapter can all lose data or starve the drive of power, and Windows then sees nothing.
Steps
- Use the cable that came with the drive. Cables are the commonest hidden fault, so try a second cable if you have one. Shorter is better, ideally under one metre.
- Plug straight into the PC. On a desktop, use a rear port on the motherboard. Skip front-panel ports, hubs, docks and monitor USB ports for now.
- Try a USB 3 port (often blue) and a USB 2 port. Some older drives behave better on one than the other.
- Bus-powered portable drives may need more power than one port gives. If your drive came with a cable that has two USB plugs, connect both. Otherwise try a powered USB hub.
- Unplug other USB drives, printers and gadgets for now. Everything on the same controller shares power.
- On a laptop, plug in the charger. Some laptops limit USB power on battery.
- Open Settings → Bluetooth & devices → USB and switch on Connection notifications. Windows then tells you if a port is too slow or low on power.
Some USB-C cables carry only power and no data. Use the cable that shipped with the drive, or one labelled for data.
3Test on another PC to find the faulty partSafeAbout 15 minutesSplits the problem in half
Use this when
Fix 1 and 2 changed nothing and you cannot tell whether the PC or the drive is at fault.
Why it works
One test on a different computer divides the problem. If the drive works there, your PC is the cause and you fix Windows. If it fails everywhere, the drive, enclosure or cable is the cause.
Steps
- Connect the drive to another computer, ideally with a different Windows version or a Mac. Use the same cable first, then a different one.
- Works on the other PC: the drive and cable are fine. Continue with Phase B (Fix 4 to 9).
- Fails on every PC: the drive, its enclosure or its USB bridge board is at fault. Go to Fix 15.
- Works on a Mac but not on Windows: the drive is probably formatted for Mac. Go to Fix 11.
- Optional, for drives in an enclosure: a bare drive can be tested in a different enclosure or a USB-to-SATA dock. Many sealed portable drives have a connector that is part of the drive, so only do this if you are sure of your model. Opening an enclosure may void the warranty.
Make Windows see the device
Disk Management, drive letters, Device Manager, power settings and drivers.
4Read Disk Management and Disks & volumesSafeAbout 5 minutesA diagnosis, not a repair
Use this when
The light is steady and you want to know what Windows sees before you change anything.
Why it works
Disk Management shows disks even when they have no drive letter or no file system, which File Explorer hides. The state it shows decides everything that comes next.
Steps
- Right-click Start and choose Disk Management.
- Look at the lower pane for a disk that is not one of your internal drives. Note its number (such as Disk 2), size and state.
- Match what you see to the decoder table above. Do not click Format, Delete Volume or Initialize yet.
- Another view: open Settings → System → Storage → Advanced storage settings → Disks & volumes. It lists connected disks and their volumes, and the Properties page shows health and file system.
- If Disk Management is slow, or says Connecting to Virtual Disk Service for a long time, open services.msc, find Virtual Disk and click Start or Restart.
Get-Disk
Get-Partition
Get-Volume
- Get-Disk: lists every disk with its number, size, partition style and status
- Get-Partition: lists partitions and drive letters
- Get-Volume: lists volumes with file system and health
5Add a drive letter or bring the disk onlineSafeAbout 10 minutesThe drive is healthy but invisible
Use this when
Disk Management shows a healthy volume with no letter, an Offline disk, or a disk marked Foreign. File Explorer shows nothing.
Why it works
File Explorer lists only volumes that have a free drive letter. A letter clash, often with a mapped network drive, hides the drive. Windows also leaves a disk Offline if its signature clashes with another disk.
Steps
- Open Disk Management. Right-click the volume on your external disk and choose Change Drive Letter and Paths, then Add (or Change).
- Pick a letter from the end of the alphabet, such as R to Z. Mapped network drives often use the later letters, so check This PC for them or run
net usein a Command Prompt. - Offline disk: right-click the grey disk box on the left (where it says Disk 2) and choose Online.
- Foreign disk: right-click the disk box and choose Import Foreign Disks, then follow the wizard.
- PowerShell does the same job if the menu is greyed out. Use your own disk number and letter, and check the number with
Get-Diskfirst.
Get-Disk
Set-Disk -Number 2 -IsOffline $false
Set-Partition -DiskNumber 2 -PartitionNumber 1 -NewDriveLetter R
- Set-Disk … -IsOffline $false: brings the disk online
- Set-Partition … -NewDriveLetter: assigns a drive letter to the first partition of disk 2
The commands above use Disk 2 as an example. Always confirm the number with Get-Disk so you never touch your internal disk.
6Reinstall the USB and disk entries in Device ManagerCautionAbout 15 minutesClears stale or corrupted device records
Use this when
Device Manager shows Unknown USB Device, a yellow warning, error Code 43, or nothing changes when you plug the drive in.
Why it works
Windows keeps a record for every USB device it has met. A damaged or ghost record can stop the same drive from loading again. Removing the record makes Windows build a fresh one. Your files are not affected.
Steps
- Right-click Start, open Device Manager, then choose View → Show hidden devices.
- Expand Disk drives, Universal Serial Bus controllers, Storage controllers, Portable Devices and Other devices.
- Right-click your drive, any USB Mass Storage Device, and any Unknown USB Device and choose Uninstall device. Do not tick the option to delete driver software. Greyed-out entries are old ghosts and are safe to remove too.
- Unplug the drive and restart the PC.
- After sign-in, plug the drive back in. If it does not appear, choose Action → Scan for hardware changes.
- Optional: uninstall Generic USB Hub and USB Root Hub (USB 3.0) entries too. Your keyboard and mouse may blink off for a moment, then Windows reinstalls them.
Uninstalling the Disk drives entry removes only Windows' record of the device. The data on the disk is untouched.
7Turn off USB power savingSafeAbout 10 minutesFixes drives that drop out or disappear
Use this when
The drive works for a while, then vanishes, or it disappears after sleep or when the laptop is on battery.
Why it works
Windows saves power by switching idle USB ports off. Some drives and enclosures do not wake up properly, so Windows loses them mid-use.
Steps
- Open Control Panel → Power Options, click Change plan settings for your plan, then Change advanced power settings.
- Expand USB settings → USB selective suspend setting and set both On battery and Plugged in to Disabled. Click OK.
- Open Device Manager → Universal Serial Bus controllers. For each Generic USB Hub and USB Root Hub (USB 3.0), open Properties → Power Management and untick Allow the computer to turn off this device to save power.
- Open Settings → System → Power & battery and set the power mode to Balanced or Best performance while you test. If your build shows a USB battery saver option under Bluetooth & devices → USB, keep it off while you test.
- Restart the PC and reconnect the drive.
8Update, roll back or remove the driver and the updateCautionAbout 20 to 40 minutesWhen it broke after an update
Use this when
The drive stopped working after a Windows update, a driver update or a new USB device, or your chipset drivers are old.
Why it works
The USB host controller driver talks to every USB port. An update that changes it can break one drive while others work. Updating, rolling back or removing the change restores the earlier behaviour.
Steps
- Open Settings → Windows Update, click Check for updates, then Advanced options → Optional updates and install any driver updates for USB or chipset.
- Download the latest chipset and USB drivers from your PC or motherboard maker's support page, such as Intel or AMD chipset drivers, and install them.
- Roll back: in Device Manager, open Universal Serial Bus controllers, double-click the USB 3.x eXtensible Host Controller, open the Driver tab and click Roll Back Driver if the button works.
- Remove the update: open Settings → Windows Update → Update history → Uninstall updates, choose the most recent update from the time the problem started and click Uninstall. Then pause updates for a week.
- If your drive or enclosure has maker software or firmware, check the maker's support page for a newer version. Older USB-to-SATA bridges sometimes need a firmware update to work properly with newer Windows builds.
- Restart and test again.
Avoid driver updater tools. Use Windows Update or your PC or drive maker's support page.
9Do a full restart, turn off Fast Startup and check the BIOSCautionAbout 15 to 20 minutesResets the USB controller
Use this when
The drive is missing after a normal Shut down, or nothing so far has made it appear.
Why it works
Windows 11 uses a hybrid shutdown (Fast Startup) that keeps part of the hardware state saved, so USB controllers do not always reset. A true restart, or switching Fast Startup off, resets them. The BIOS can also disable USB ports.
Steps
- Use Restart (not Shut down) at least once. Restart always reloads Windows fully.
- Open Control Panel → Power Options → Choose what the power buttons do → Change settings that are currently unavailable, untick Turn on fast startup (recommended) and click Save changes.
- Open the BIOS or UEFI. Restart and press the setup key for your brand (often F2, F10, Del or Esc), or use Settings → System → Recovery → Advanced startup → Restart now → Troubleshoot → Advanced options → UEFI Firmware Settings.
- Check that USB Controller, USB Legacy Support and XHCI Hand-off are enabled. Names vary. Save and exit.
- Look in the boot menu or BIOS storage list. If the drive shows there, the hardware works and Windows is the issue. If it does not, the port or the drive is the likely cause.
- If your BIOS is several years old, check your maker's support page for a newer version. Update only with the charger connected.
The drive shows up but will not open
Locks, foreign formats, file system errors, file recovery and, only at the end, formatting.
10Unlock BitLocker or a maker-encrypted driveSafeAbout 10 minutesA locked drive looks like a missing one
Use this when
File Explorer shows a padlock on the drive, Disk Management shows a drive with no readable file system, or the drive appears as a tiny CD drive or 0 bytes.
Why it works
Encrypted drives stay locked until you give a password or recovery key. Some drives with built-in password protection show a small virtual drive until you run the maker's unlock tool.
Steps
- BitLocker: in File Explorer, right-click the padlock drive and choose Unlock Drive, then enter the password or the 48-digit recovery key.
- To find a recovery key, check the Microsoft account that was used to set it up (the Devices page in your account), a printed copy, a saved file or your organisation's IT team.
- Maker encryption: if the drive shows a small virtual CD drive or 0 bytes, open that drive and run the unlock tool inside it, or install your maker's utility (for example the drive maker's security or utilities app). The tool name depends on the model.
- Check the lock state in a Command Prompt (Admin) if the graphical prompt does not appear.
manage-bde -status
manage-bde -unlock E: -RecoveryPassword 000000-000000-000000-000000-000000-000000-000000-000000
- manage-bde -status: shows which volumes are encrypted and locked
- manage-bde -unlock: unlocks a volume with its recovery password (replace E: and the key with your own)
Without the password or the recovery key, encrypted data cannot be recovered. Do not format the drive if you may still find the key.
11Identify an unreadable file system (Mac, Linux or console)SafeAbout 15 minutesWindows may offer to format. Do not click yet.
Use this when
The drive is healthy in Disk Management but has no letter, or Windows says You need to format the disk or shows RAW. The drive came from a Mac, a Linux PC, a PlayStation, an Xbox or a NAS.
Why it works
Windows reads NTFS, exFAT and FAT32. It cannot read Mac (APFS, HFS+), Linux (ext4, Btrfs, XFS) or console drive formats. The data is probably fine. Windows just does not understand it, and its Format prompt would erase it.
Steps
- Ask where the drive was last used. Check the File system column in Disk Management, and the Disks & volumes page in Settings.
- Mac drive (APFS or HFS+): plug it into a Mac and copy the files to an exFAT drive. Or install a third-party driver for Windows that reads Mac formats. These drivers are often paid, with trials.
- Linux drive (ext4): boot a Linux live USB and copy the files, or use WSL 2 in Windows 11 to mount it (see the command below).
- PlayStation or Xbox drive: plug it back into the console. Games on these drives are tied to the console, and formatting for Windows erases them. They can usually be downloaded again.
- NAS or RAID drive: put it back in the NAS, or use a recovery tool that understands RAID.
- After you have copied what you need, format the drive as exFAT (Windows and Mac) or NTFS (Windows only) in Fix 14.
wsl --mount \\.\PHYSICALDRIVE2 --partition 1
- wsl --mount: attaches a Linux-formatted disk to WSL 2 so you can copy files (use your own disk number from Get-Disk, and your own partition number)
If Windows says you need to format the disk and the drive holds files you need, click Cancel and recover or move the files first.
12Check and repair file system errors with chkdskCautionAbout 20 minutes to several hoursOnly for a quiet, stable drive
Use this when
The drive is detected, has a letter and shows errors such as The file or directory is corrupted and unreadable, The parameter is incorrect or Location is not available.
Why it works
A drive that was unplugged during a write, lost power or hit a bad sector can have a damaged file system. Chkdsk scans it and repairs the structure so Windows can read it again.
Steps
Do not run chkdsk if the drive clicks, disconnects often or you only have one copy of important files. Chkdsk changes data on the disk. Go to Fix 13 first, then come back.
- Note the letter of the drive, for example E:.
- Open File Explorer, right-click the drive, choose Properties → Tools → Check.
- Or open Command Prompt (Admin) and run the first command below. Use the second form only if you suspect bad sectors, because it can take hours on a large drive.
- Do not unplug or sleep the PC during the scan. Read the result when it finishes.
- If you see CHKDSK is not available for RAW drives, the file system is too damaged for chkdsk. Go to Fix 13.
chkdsk E: /f
chkdsk E: /f /r
- /f: fixes file system errors
- /r: also scans for bad sectors and recovers readable data (slow)
Repair-Volume -DriveLetter E -Scan
- -Scan: checks the volume without fixing anything
13Recover your files before you repair anythingSafeAbout 30 minutes to several hoursProtect the only copy
Use this when
The disk shows RAW, Unallocated or Not Initialized, or chkdsk could not run, and the files matter to you.
Why it works
Creating a volume, formatting or initializing writes new structures on the disk. That can overwrite what recovery tools need. Recovering first, to a different drive, gives you a safe copy before you change anything.
Steps
- Do not initialize, create a volume or format the drive yet.
- Install the recovery tool on your internal drive, never on the drive you are recovering.
- Pick a tool: TestDisk and PhotoRec are free and open source, Windows File Recovery is free from Microsoft Store and runs in the command line, and several paid tools offer a friendlier screen.
- Choose the damaged drive as the source and a different drive with enough free space as the destination.
- Run a scan, preview what it finds, and copy the files you need. Check that they open.
- If the drive is slow, clicks or keeps dropping, stop and use a professional recovery service rather than repeated scans.
winfr E: D:\Recovered /extensive
- winfr: scans drive E: and saves recovered files to D:\Recovered (the destination must be a different drive)
Tools such as PhotoRec recover file contents but not always the original names or folders. Sorting recovered files takes patience, but it is worth it.
14Initialize, create a volume or format the driveErases dataAbout 10 to 30 minutesLast software step. This erases the drive.
Use this when
You have recovered your files or the drive is empty, and Disk Management shows Not Initialized, Unallocated or RAW.
Why it works
A new, wiped or unreadable disk needs a partition table and a file system before Windows can use it. This step builds them from scratch.
Steps
Only continue if your files are safely copied elsewhere, or you do not need them. Double-check you picked the external disk, not your internal one.
- Open Disk Management. If the disk says Not Initialized, right-click the disk box and choose Initialize Disk. Choose GPT for modern PCs and drives over 2 TB, or MBR only for very old systems, some TVs and older consoles.
- Right-click the Unallocated space and choose New Simple Volume. Follow the wizard.
- File system: choose exFAT if you use the drive on both Windows and Mac, or NTFS for Windows only. FAT32 works everywhere but cannot hold files over 4 GB.
- Leave the allocation unit at Default, type a volume label, tick Perform a quick format and finish.
- For a RAW volume, right-click it and choose Format with the same options.
- If Format fails or never completes, stop and go to Fix 15. The drive may be failing.
The diskpart command clean wipes the partition table of the selected disk without asking again. Use Disk Management unless you know your disk number for certain. A wrong number could erase your internal drive.
Hardware health and last resort
When the evidence points at the drive, its enclosure or the PC.
15Test the drive's health, then repair, recover or replace itCautionAbout 20 minutesDecide with evidence
Use this when
Nothing has worked, the drive clicks, beeps or disconnects, or it fails on every computer and port.
Why it works
At this point the cause is probably the drive, its USB bridge board or its enclosure. A health check tells you whether to recover the data first, replace a part or replace the drive.
Steps
- If you can see the disk, check its health: run the PowerShell command below and read HealthStatus and OperationalStatus. Warning or Unhealthy means copy your files now.
- Run the maker's diagnostic tool if one exists for your drive (Seagate, Western Digital, Toshiba and Samsung publish tools). Many third-party health tools can read drive status through a USB enclosure, but not every enclosure passes this data on.
- Clicking, grinding, beeping or repeated spin-up: unplug the drive and stop. Do not freeze it, shake it or open it. Contact a professional recovery service if the data matters.
- The drive is fine on a direct connection but not in its enclosure: the USB bridge board is probably faulty. Replacing the enclosure or using a USB-to-SATA adapter can bring the data back.
- Check the warranty. Many drives are covered for two to five years from the serial number on the label. Contact the maker with your results.
- If the data is already safe, replace the drive. Keep a second copy of important files from now on.
Get-PhysicalDisk | Format-Table FriendlyName,MediaType,BusType,HealthStatus,OperationalStatus,Size -AutoSize
- HealthStatus: Healthy, Warning or Unhealthy
- OperationalStatus: OK, Lost Communication, Predictive Failure and similar states
All drives wear out. Portable hard drives do not like drops or movement while spinning. Back up important files to a second place so one failed drive never means lost files.
Drives Windows cannot read by design
If your drive came from a Mac, a console or a NAS, Windows may see the disk but not its files. The data is usually fine. Do not accept the Format prompt.
| Last used on | Typical format | Windows 11 can read it? | What to do |
|---|---|---|---|
| Mac | APFS, HFS+ (Mac OS Extended) | No, not without a third-party driver | Copy files on a Mac, or use a driver. Use exFAT for both systems. |
| Windows and Mac | exFAT | Yes | If it is not detected, the cause is elsewhere. See Fix 1 to 9. |
| Linux | ext4, Btrfs, XFS | No | Use a Linux live USB, or mount ext4 with WSL 2 in Windows 11. |
| PlayStation 4 or 5 | Console format | No | Plug it back into the console. Formatting erases the installed games. |
| Xbox One or Series | Console format | No | Plug it back into the console. Formatting erases the installed games. |
| NAS or RAID | Linux RAID, ZFS, Btrfs | No | Put it back in the NAS, or use a recovery tool that supports it. |
| Encrypted drive | BitLocker, VeraCrypt, maker encryption | Only after unlocking | Use the password or the recovery key (Fix 10). |
| Camera or dashcam card | exFAT, FAT32 | Yes | Check the card reader, cable and port first. |
Some external drives sold as Mac-ready come formatted with a Mac file system from the factory. On Windows they show in Disk Management with no letter. Recover anything you need, then format as exFAT.
Drive types compared
Each kind of drive fails in its own way. Use this table to choose where to look first.
| Drive type | Gets power from | Typical problem | Quick tip |
|---|---|---|---|
| Portable 2.5 inch hard drive | From the USB port | Weak ports, hubs and cables. Clicking when underpowered | Plug in directly. Use the Y cable or a powered hub. |
| Desktop 3.5 inch hard drive | Its own AC adapter | Wrong or dead adapter, power switch off | Use the original adapter and check the switch. |
| Portable SSD | From the USB port | Poor USB-C cable, slow or limited port, firmware | Use the supplied cable and a direct port. |
| NVMe or M.2 enclosure | From the USB port | Overheating, bridge chip faults, cable quality | Let it cool, try another cable and update firmware. |
| USB flash drive | From the USB port | Partition or file system damage, worn flash | Same fixes. Recover files first if they matter. |
| Drive in a dock or hub | Shared | Power shared between devices | Connect straight to the PC to test. |
Not showing in the BIOS, boot menu or Windows Setup
A data drive normally does not show up as a boot device, so its absence from the boot menu is not a fault by itself.
- Open the BIOS or UEFI (restart and press F2, F10, Del or Esc, depending on your brand).
- Check the storage or USB list. If the drive is named there, the hardware and port work, and the problem is inside Windows (Phase B and C).
- Enable USB support. Make sure the USB controller, USB legacy support and XHCI hand-off are enabled. Names vary by maker.
- Boot menu: a drive appears there only if it holds bootable files. A normal storage drive will not, which is expected.
- Windows Setup: if you installed Windows from a USB installer and cannot see a drive, the drive may not be a supported install target. Use it for data after Windows is installed.
- Not in the BIOS at all: test another port, cable and PC (Fix 2 and Fix 3).
Command cheat sheet
Grouped by what the commands do to your drive. Always replace the disk number and drive letter with your own.
Read-only: safe to run any time
Get-Disk
Get-Partition
Get-Volume
Get-PhysicalDisk | Format-Table FriendlyName,MediaType,BusType,HealthStatus,OperationalStatus,Size -AutoSize
Get-PnpDevice -Class DiskDrive
Get-PnpDevice -Class USB | Where-Object Status -ne 'OK'
Repair-Volume -DriveLetter E -Scan
- Get-Disk, Get-Partition, Get-Volume: show disks, partitions and volumes
- Get-PhysicalDisk: shows health and bus type
- Get-PnpDevice: lists devices and flags the ones with problems
- Repair-Volume -Scan: checks a volume without fixing it
net use
manage-bde -status
- net use: shows mapped network drives that may use your drive letter
- manage-bde -status: shows BitLocker state
Changes settings or files: use with care
Set-Disk -Number 2 -IsOffline $false
Set-Partition -DiskNumber 2 -PartitionNumber 1 -NewDriveLetter R
chkdsk E: /f
- Set-Disk: brings a disk online
- Set-Partition: assigns a drive letter
- chkdsk /f: repairs file system errors and can change data
Erases data: only after your files are safe
diskpart
list disk
select disk 2
clean
create partition primary
format fs=exfat quick
assign
- list disk: shows every disk with its size. Compare sizes to identify the external one
- select disk 2: chooses the disk. Using the wrong number can wipe your internal drive
- clean: removes the partition table and makes the files hard to recover
Use Disk Management instead of diskpart unless you must use the command line. If you do use diskpart, check the size of the selected disk before you type clean.
Keep it from happening again
Do’s and don’ts
Do
- Plug the drive straight into a rear USB port
- Read the disk state in Disk Management first
- Recover files to a different drive before repairs
- Use the maker’s adapter and cable
- Back up the files once they are safe
Don’t
- Click Format or Initialize just because Windows asks
- Run chkdsk on a clicking or dropping drive
- Install recovery software on the damaged drive
- Use driver updater tools from unknown sites
- Open a hard drive, shake it or put it in a freezer
Frequently asked questions
Why is Windows 11 not detecting my external hard drive?
Why does my external hard drive show in Device Manager but not in File Explorer?
Why does my external hard drive show in Disk Management but not in File Explorer?
What do I do if Disk Management says Not Initialized or Unallocated?
Windows asks me to format the disk. Should I click Format?
Why is my external hard drive not detected after a Windows 11 update?
My external hard drive light is on but nothing happens. What should I check?
My external hard drive light is blinking and it is not detected. Why?
My external hard drive is clicking or beeping. What should I do?
Why does my external hard drive keep disconnecting in Windows 11?
Can Windows 11 read a Mac-formatted external hard drive?
Why is my PS4, PS5 or Xbox external hard drive not detected on my PC?
Why is my G-DRIVE or other Mac-ready drive not showing up on Windows 11?
Why is my Western Digital, Seagate or Samsung drive not detected?
Why is my external SSD or NVMe enclosure not detected?
Is a USB 3.0 or USB-C hard drive different from a USB 2.0 drive?
Does the same fix work in Windows 10 and Windows 7?
Why is my external hard drive not showing in the BIOS or the boot menu?
Is it safe to run chkdsk on an external hard drive?
Will uninstalling the drive in Device Manager erase my files?
Can I recover files from a RAW external hard drive?
When should I replace my external hard drive?
Bottom line
When Windows 11 does not detect an external hard drive, the cause is usually power, a cable or port, a missing drive letter, a lock, or a file system Windows cannot read. Check the light, swap the cable and port, read Disk Management, add a drive letter and look for a lock or a Mac or console format. Recover your files before you repair or format anything. If the drive clicks, disconnects everywhere or reports a Warning status, stop and protect the data.
Run the diagnosis again